Query Your Architecture and Find Blueprints with the Catio MCP
This guide walks through connecting an AI coding client to Catio over the MCP and using it to explore your live architecture without leaving your editor. By the end, you will have run a set of architecture inventory queries and surfaced a Blueprint tied directly to what those queries returned.
This guide uses Claude Code on Windows (PowerShell). The setup steps reflect that environment. The architecture queries in Steps 3 through 6 work the same regardless of which client you use.
Before you begin, you will need a Catio account with at least one workspace configured. If you have not set one up yet, see doc:getting-started.
Part 1: Install Claude Code
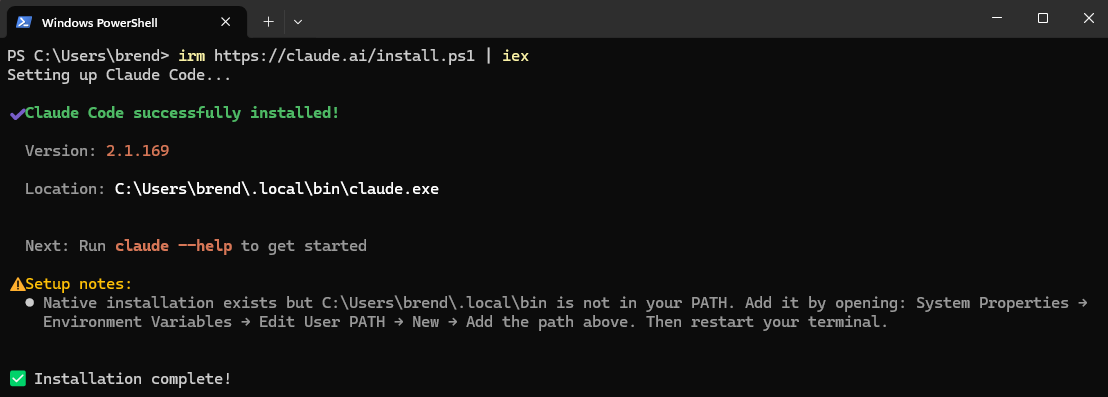
1. Run the installer
Open PowerShell and run:
irm https://claude.ai/install.ps1 | iexThe installer downloads the Claude Code binary and places it at C:\Users\<you>\.local\bin\claude.exe. When it completes, you will see a setup note: the binary location is not yet on your PATH.
2. Add Claude Code to your PATH
- Press Win + S and search for Edit the system environment variables
- Click Environment Variables
- Under User variables, select Path and click Edit
- Click New and enter:
C:\Users\<you>\.local\bin - Click OK on all open windows
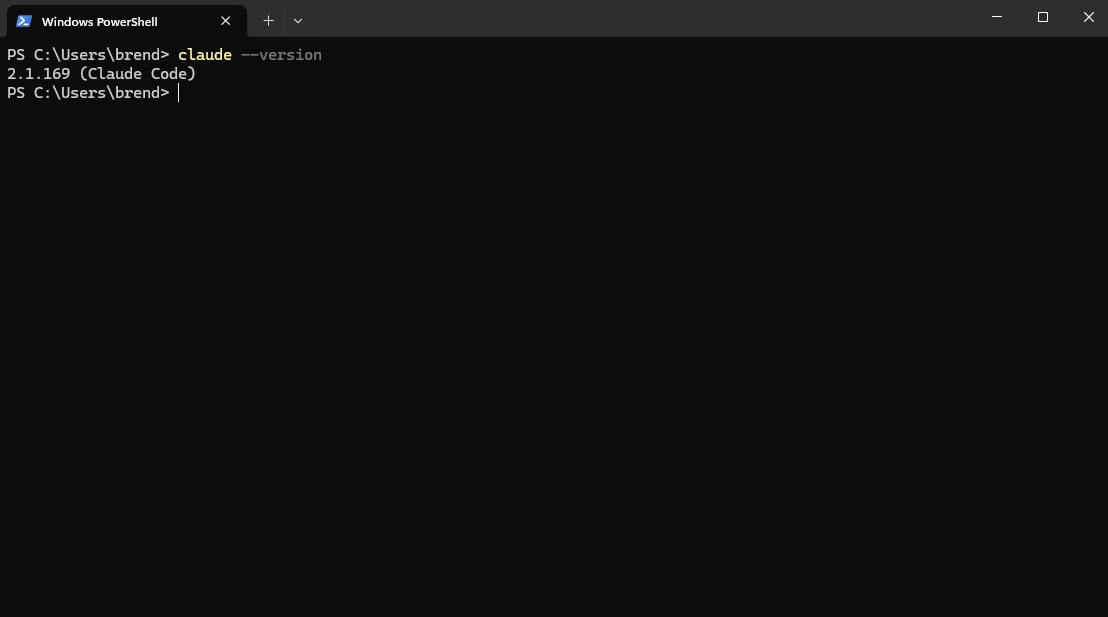
Restart PowerShell, then verify the install:
claude --versionYou should see a version number returned.
Part 2a: Connect the Catio MCP
3. Add the Catio MCP server
In PowerShell, run:
claude mcp add --transport http catio https://mcp.catio.tech/mcpYou will see a confirmation that the server was added to your local config.

4. Authenticate
Start a Claude Code session by running claude in your terminal. Then run:
/mcp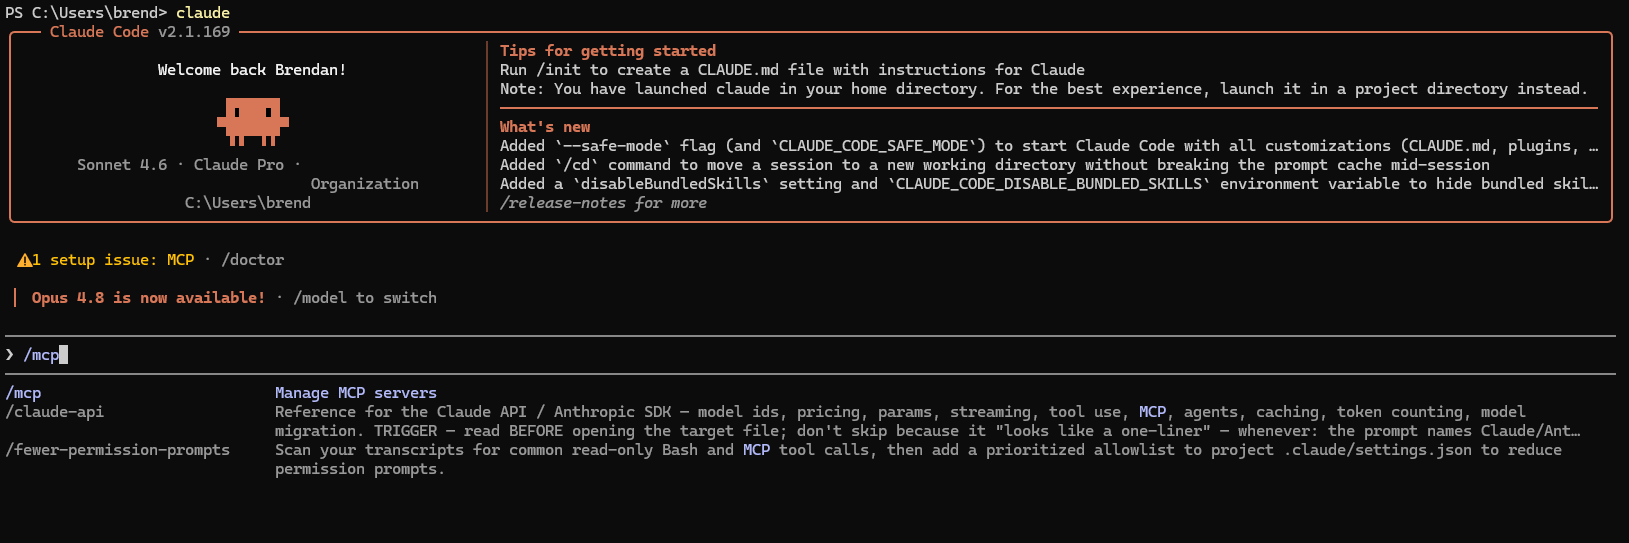
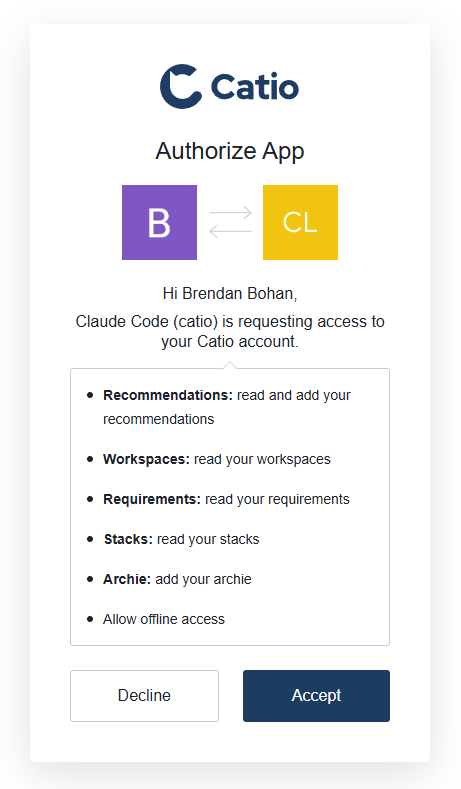
Find catio in the list — it will show needs authentication. Select it and choose Login. A browser window opens with an authorization prompt. Review the requested permissions and click Accept.
Once authorized, return to your Claude Code session. Catio is now connected.
Part 2b: Check Your Tools
Level-set with your CLI. You can check what tools you have by asking like below or drilling into
/mcp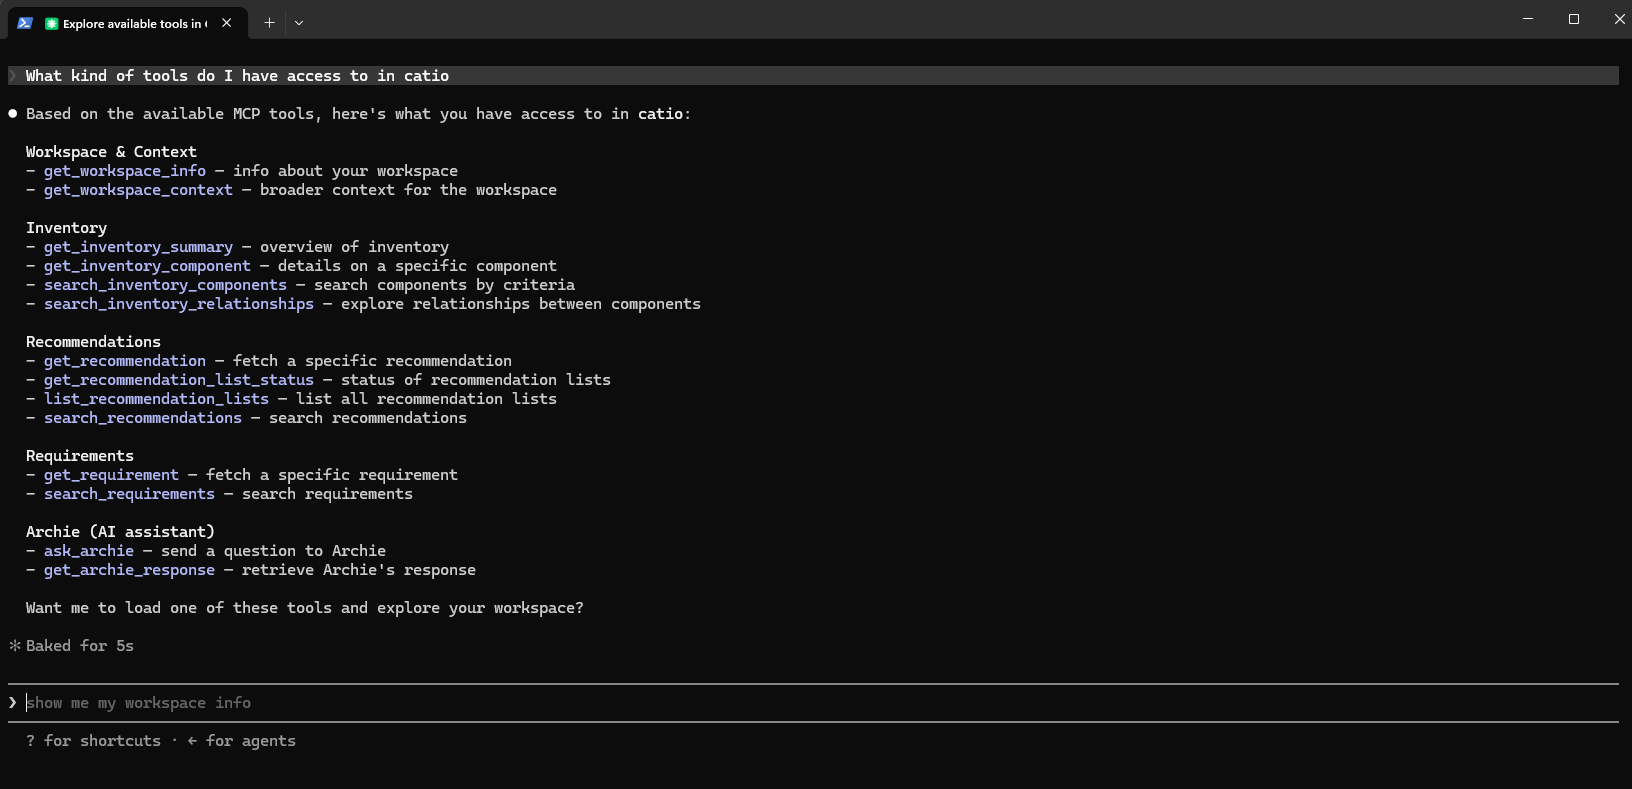
Part 3: Query Your Architecture
With the MCP connected, you can ask your assistant about your live architecture directly from the session. The following prompts walk through a realistic investigation: starting with a broad inventory summary, drilling into a specific cluster, following a workload thread, and landing on a Blueprint tied to what you found.
The component names and results in this guide reflect a specific workspace. Your inventory will return results from your own stack. Use these prompts as a starting point and follow what your data surfaces.
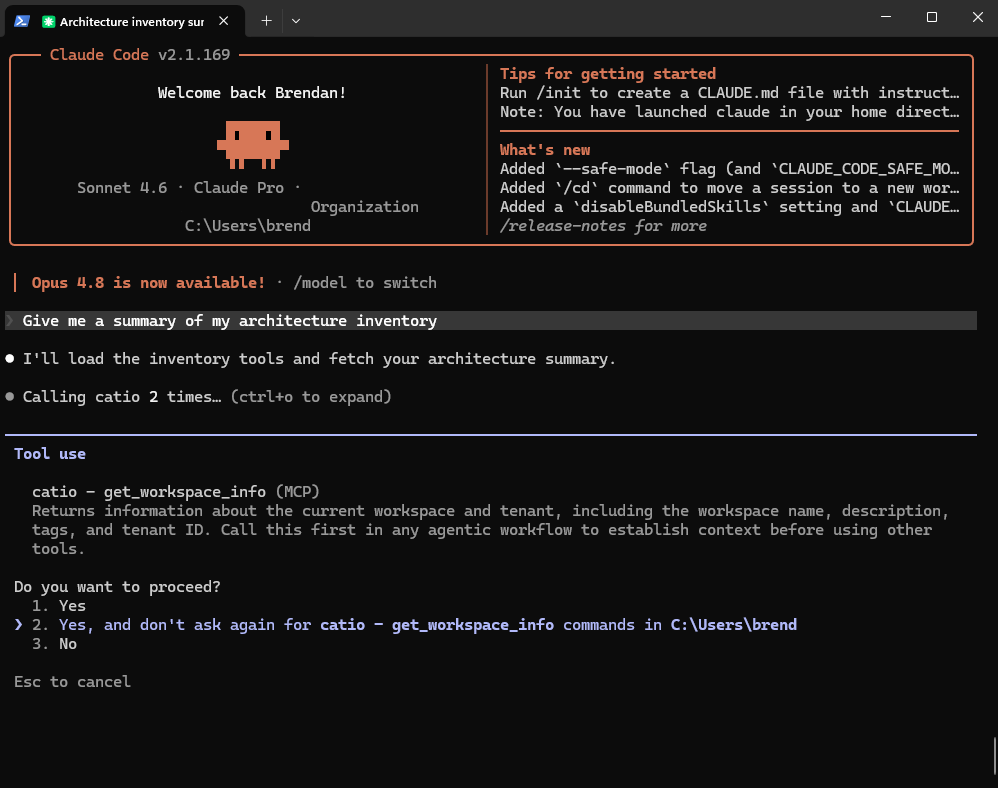
Step 1: Get an inventory summary
Start with a broad picture of what is in your stack:
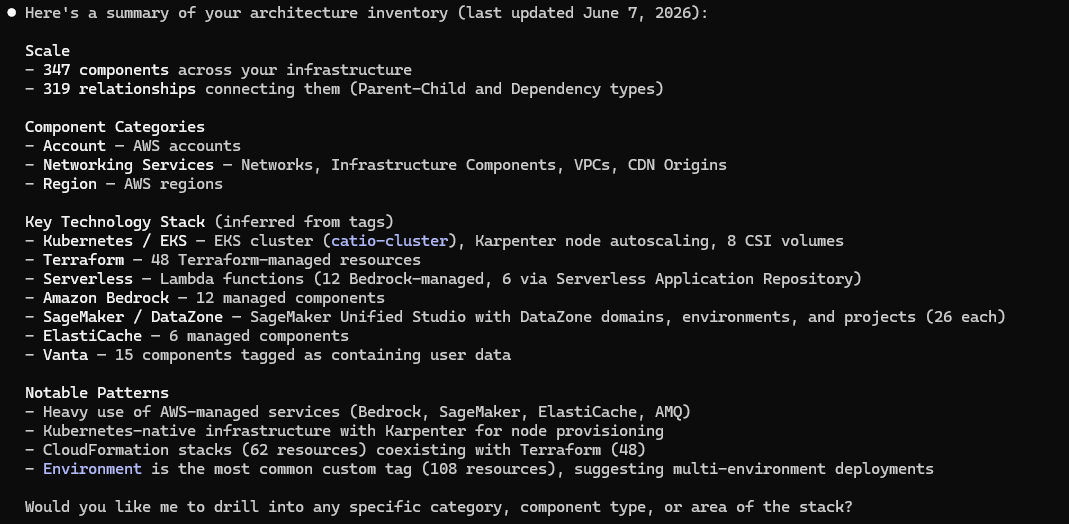
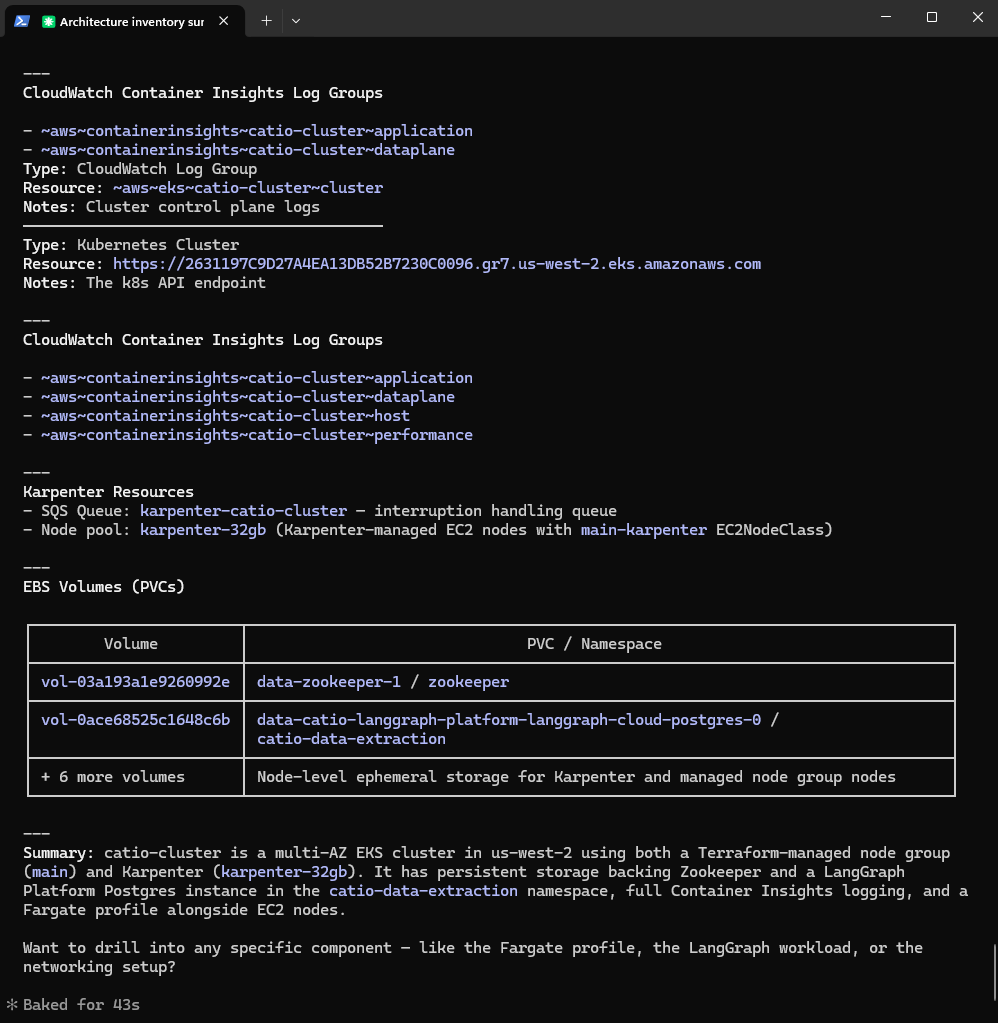
Give me a summary of my architecture inventoryThis calls get_inventory_summary and returns a breakdown of your components, categories, key technologies, and notable patterns across your infrastructure.
Step 2: Explore a specific component's relationships
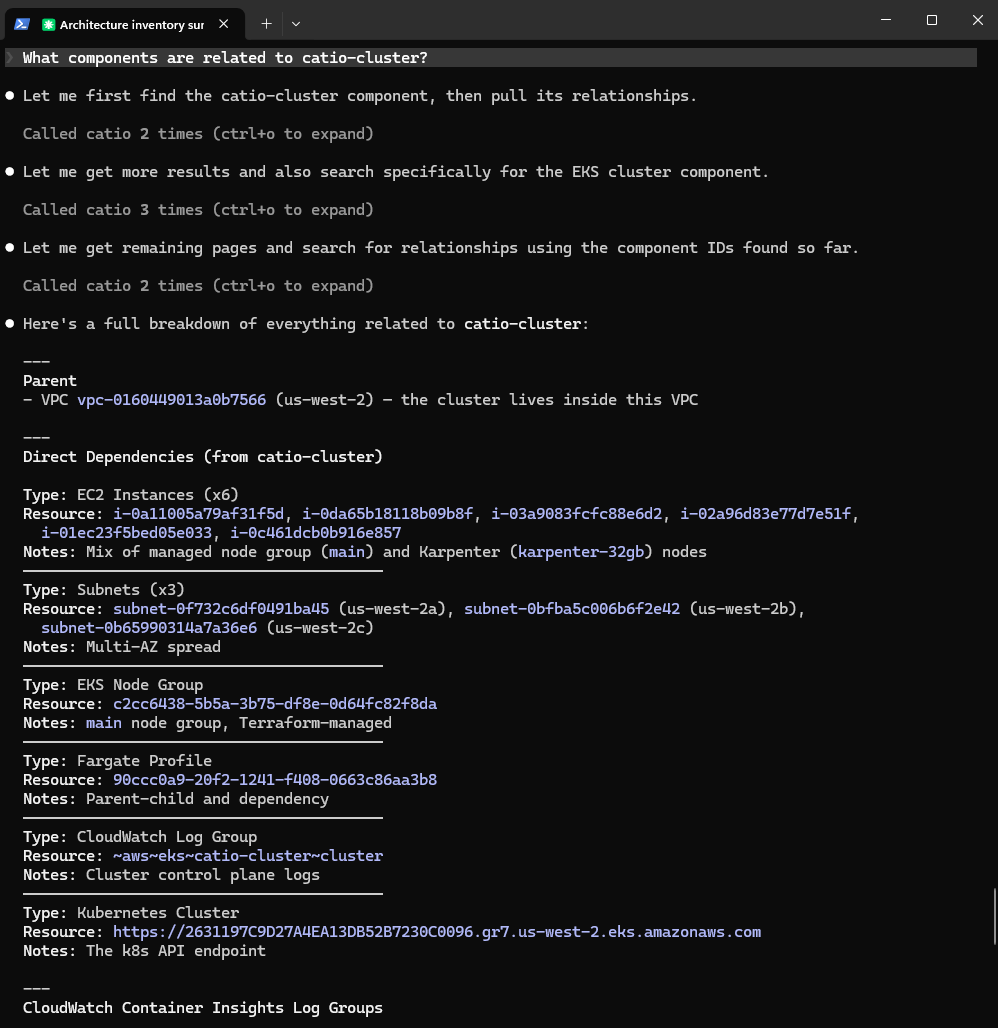
Pick a component from the summary and dig into what it connects to:
What components are related to [component name]?This calls search_inventory_relationships and returns the full set of components connected to that resource: compute nodes, storage volumes, networking, observability, and any inferred workloads.
Step 3: Follow a workload thread
The relationships query will likely surface a specific workload or service running in your stack. Follow it further:
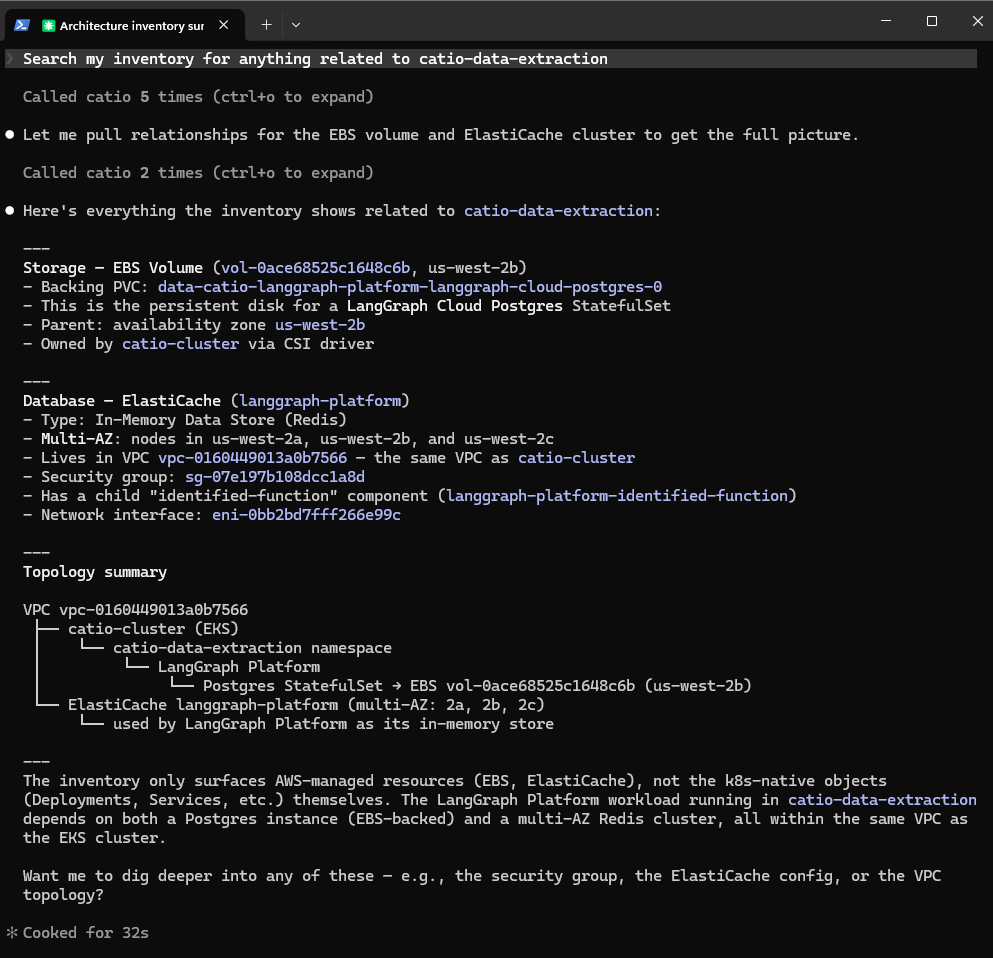
Search my inventory for anything related to [workload or service name]This calls search_inventory_components and returns infrastructure tied to that workload, including any flags or notable patterns Catio has identified on those components.
Step 4: Surface a Blueprint
If the previous query returned flagged components or concerns, check whether Catio has already identified a Blueprint addressing them:
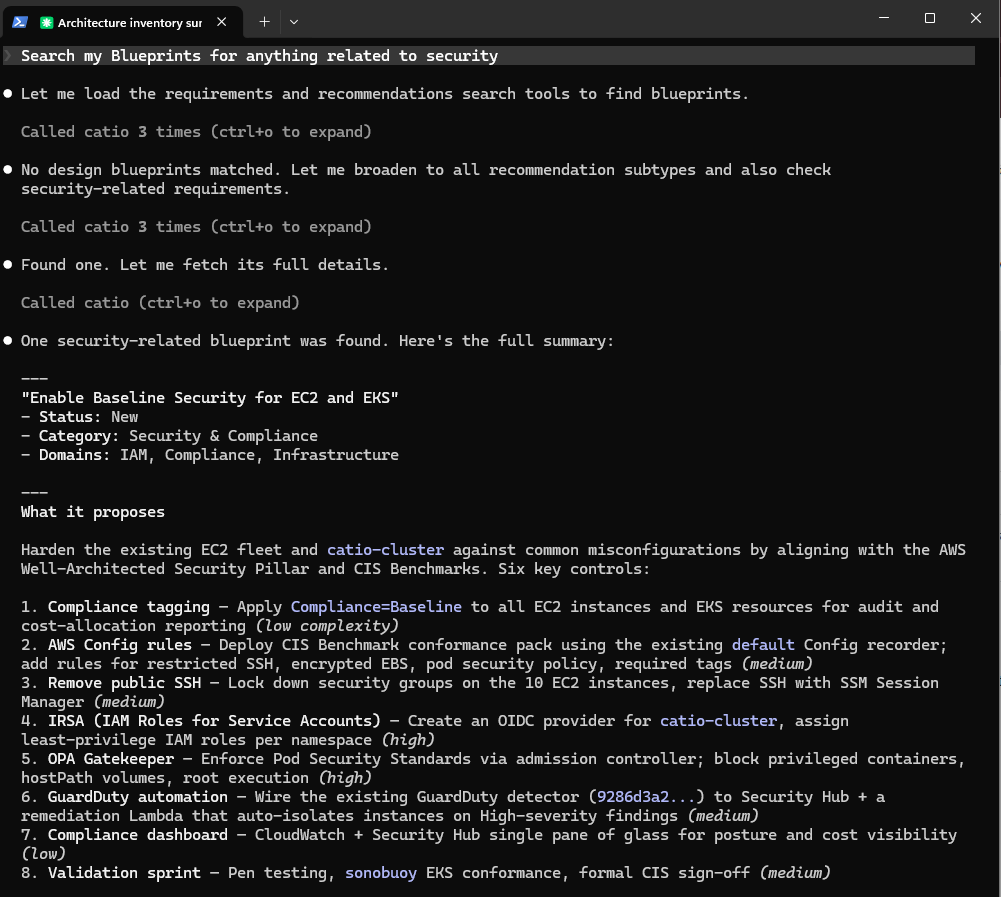
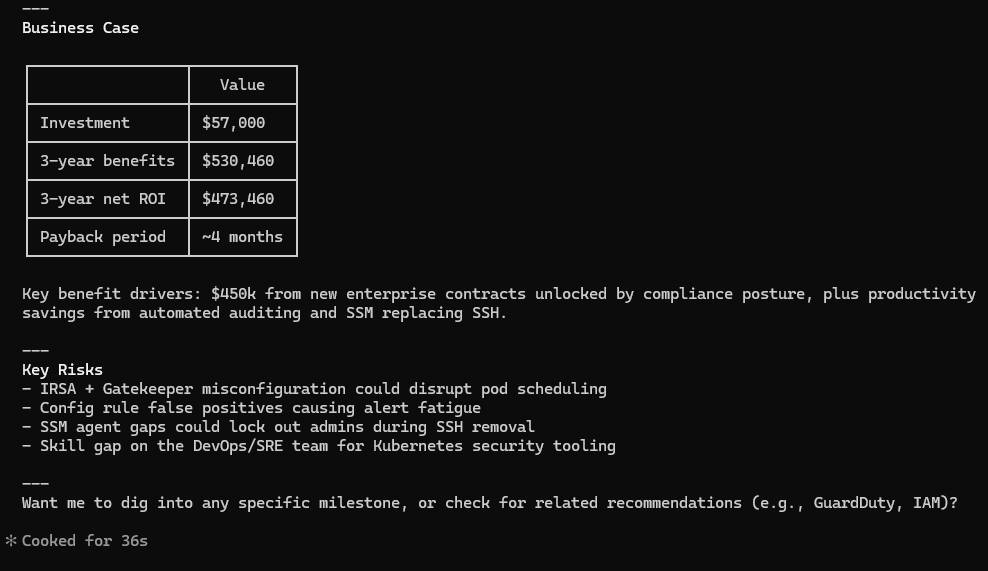
Search my Blueprints for anything related to [concern or theme]This calls search_recommendations and returns any Blueprints in your workspace matching that theme, including their status, implementation milestones, and business case.
What You Just Did
In four prompts, you moved from a broad inventory overview to a specific workload, identified a real concern in your infrastructure, and found a Blueprint that Catio had already generated to address it — all without leaving your editor.
From here, you can open that Blueprint in the Catio UI to review the full implementation plan, or continue querying through the MCP. For next steps on working with Blueprints, see doc:blueprints.