
Sublists
Plans can now be broken out into sublists, giving you a clean way to organize work into phases, categories, or any grouping that fits how your team executes. Instead of one long, flat list of items, you can structure a plan into sections: "Phase 1: Foundation," "Phase 2: Migration," and "Phase 3: Hardening," or by category such as security, performance, and cost. Larger initiatives stay readable and progress is easy to track at a glance.
When to use a sublist
Sublists are most useful once a plan grows past a handful of blueprints. Common ways teams break a plan down:
- By phase: sequence work into stages like Foundation, Migration, and Hardening so dependencies are clear and the team knows what comes first.
- By category: group blueprints under themes such as security, performance, and cost to keep related changes together.
- By owner or team: carve out sections for the groups responsible for delivery so each team sees its slice at a glance.
Creating a sublist
From inside a plan, open the + menu in the Blueprints header and select Create Sublist.
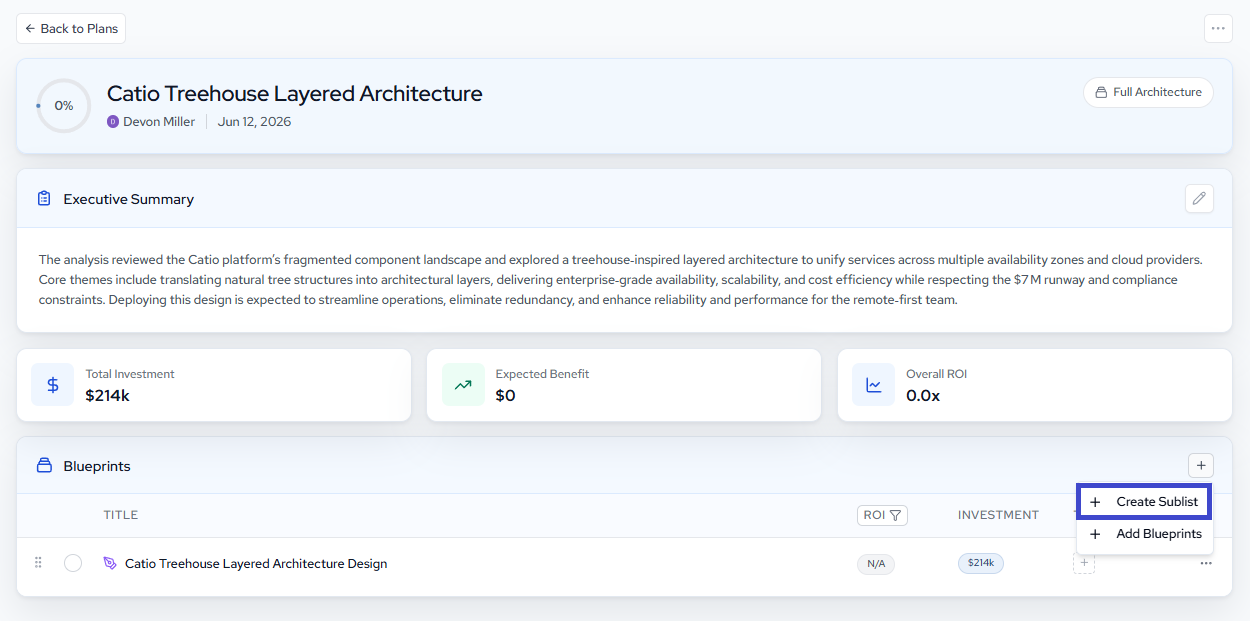
This opens the Create sublist dialog, where you define the section.
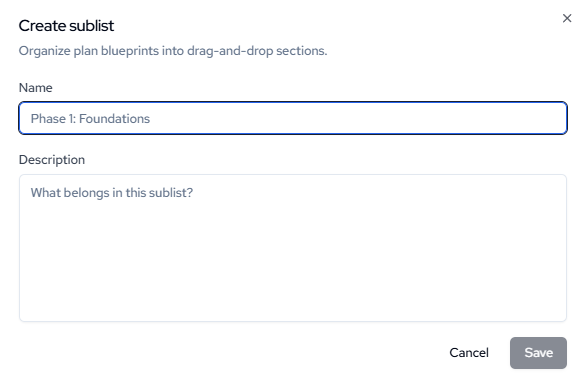
Fill in the following:
- Name (required): a short, descriptive label for the section, such as "Phase 1: Foundations." This is what appears as the section header in your plan.
- Description (optional): a note on what belongs in the sublist. Use it to capture the intent of the grouping so the rest of the team understands what should and should not go there.
Click Save to add the sublist to your plan. The new section appears in the Blueprints list, ready for you to organize blueprints into it.
You can create as many sublists as a plan needs. Add them up front to scaffold a plan before you populate it, or introduce them later as an initiative grows and a flat list becomes harder to scan.
For more on building and managing plans, see [doc:building-plans].