

Generating Architecture-Aware Code with Catio MCP
A worked run from a committed Blueprint through to a pull request, with code generated against your real inventory rather than plausible guesses.
This workflow uses the Catio MCP, Blueprints, and Workspace Context. Start with those if any is unfamiliar.
Prerequisites
This guide assumes you have completed Querying Your Architecture with Catio MCP and have the Catio MCP server connected to your assistant. It also assumes the GitHub MCP is connected with write and pull-request scope on the target repo.
For context handling and Blueprint interpretation, see Context Best Practices.
AI-written code reflects your real stack and context instead of generic boilerplate, because Catio feeds your live architecture to the assistant before it writes a line.
When the assistant can read your workspace context and architecture inventory through Catio MCP, the code it generates reuses what you already run: your existing Redis, Postgres, cluster topology, shared clients, and naming conventions. Without that grounding, an assistant fills the gaps with plausible guesses, which is where new datastores, renamed keys, and patterns your team never agreed to come from.
Grounded output
| Decision | Grounded in your architecture | Generic boilerplate |
|---|---|---|
| Async transport | Reuses the Redis you already run | Introduces Kafka or RabbitMQ you do not |
| Datastore | Writes to the existing Postgres | Spins up a new database |
| Dedup key | Uses the real key found in the repo | Invents a new key name |
| Shared infrastructure | Consumes the shared session factory and Redis client | Re-implements its own |
How the work splits
| Component | Role |
|---|---|
| Catio MCP | Reads your architecture inventory, workspace context, and Blueprints |
| Your Choice of AI-Code Assistant | Generates the code that implements the change |
| GitHub MCP | Opens the pull request |
Catio MCP surfaces your architecture and context to the assistant. It does not write, generate, or commit code to your repo, but you can search, generate, and refine Blueprints through it. Your choice of AI-Code assistant does the writing, and the GitHub MCP opens the PR.
Your Catio inventory describes the real stack: components, relationships, and the constraints your team has set. The assistant bridges the two: it reads the architecture from Catio, locates the matching seams in the repo, and writes code that honors both.
The scenario
You are extracting the Notifications domain out of an Orders monolith into a standalone, Redis-backed async service: one step in a larger monolith-to-microservices migration.
You do not need to know up front whether a Blueprint for this change already exists. You ask Catio for it, and Catio either returns an existing Blueprint or generates one. In this walkthrough no Blueprint existed yet, so Catio generated it. The generated Blueprint comes back as a Recommendation, a Blueprint subtype.
Generation reads the PRD from your workspace context, so the PRD has to be uploaded there first. There is no way to attach it inline at generation time, so load it into context before you start.
In this demo we used something like the below PRD:
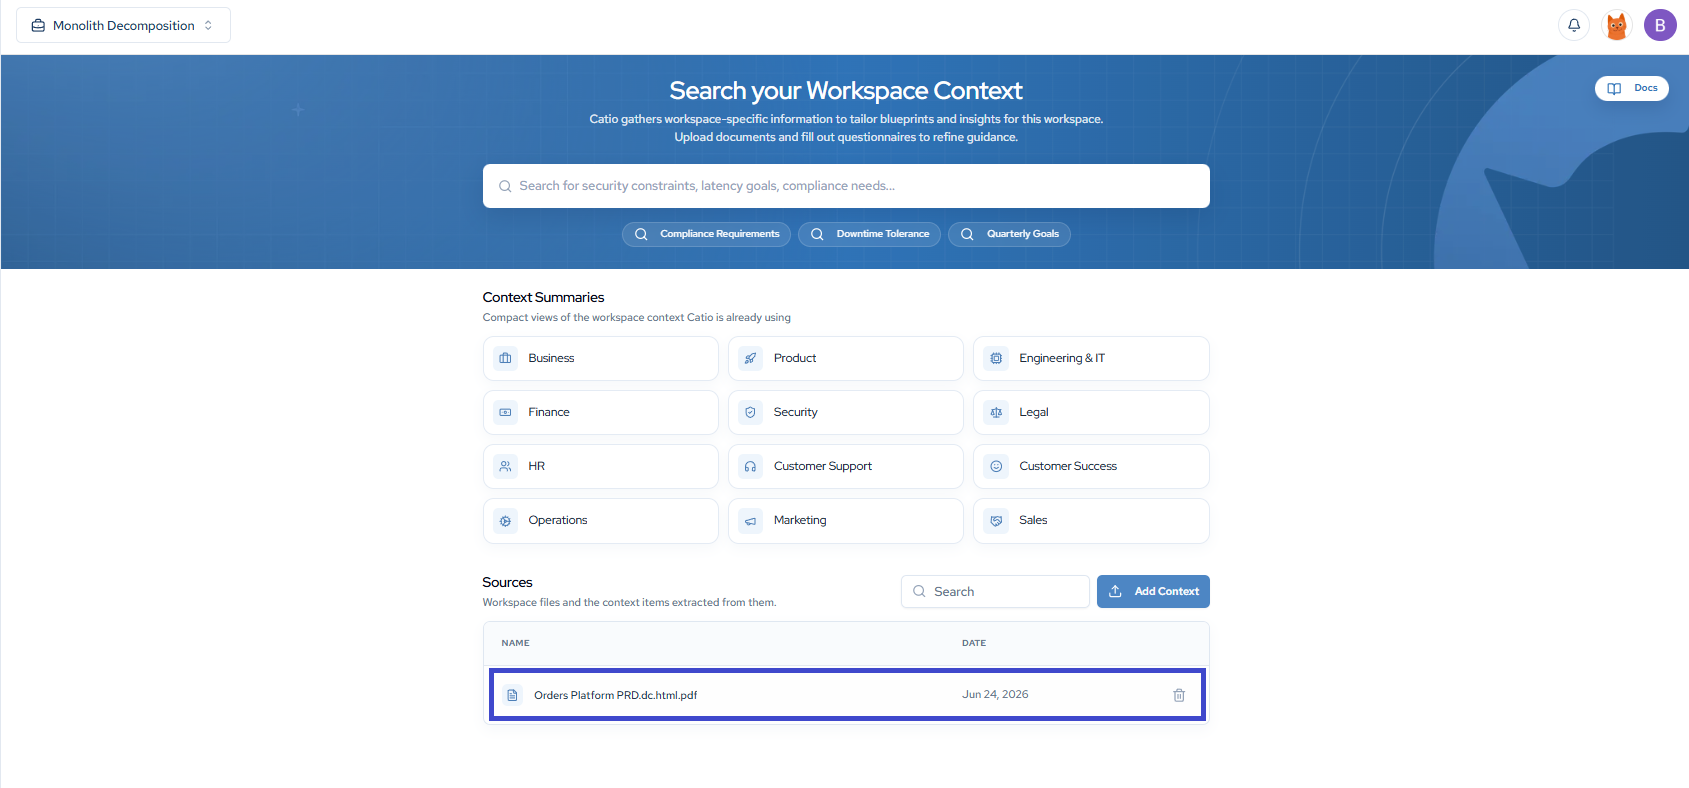
Once it is added, confirm Catio picked it up. The PRD shows up as a source under your workspace context, and the category summaries draw from it. You should see something like the screenshot below before continuing.
Step 1: Protect the monolith with a branch structure
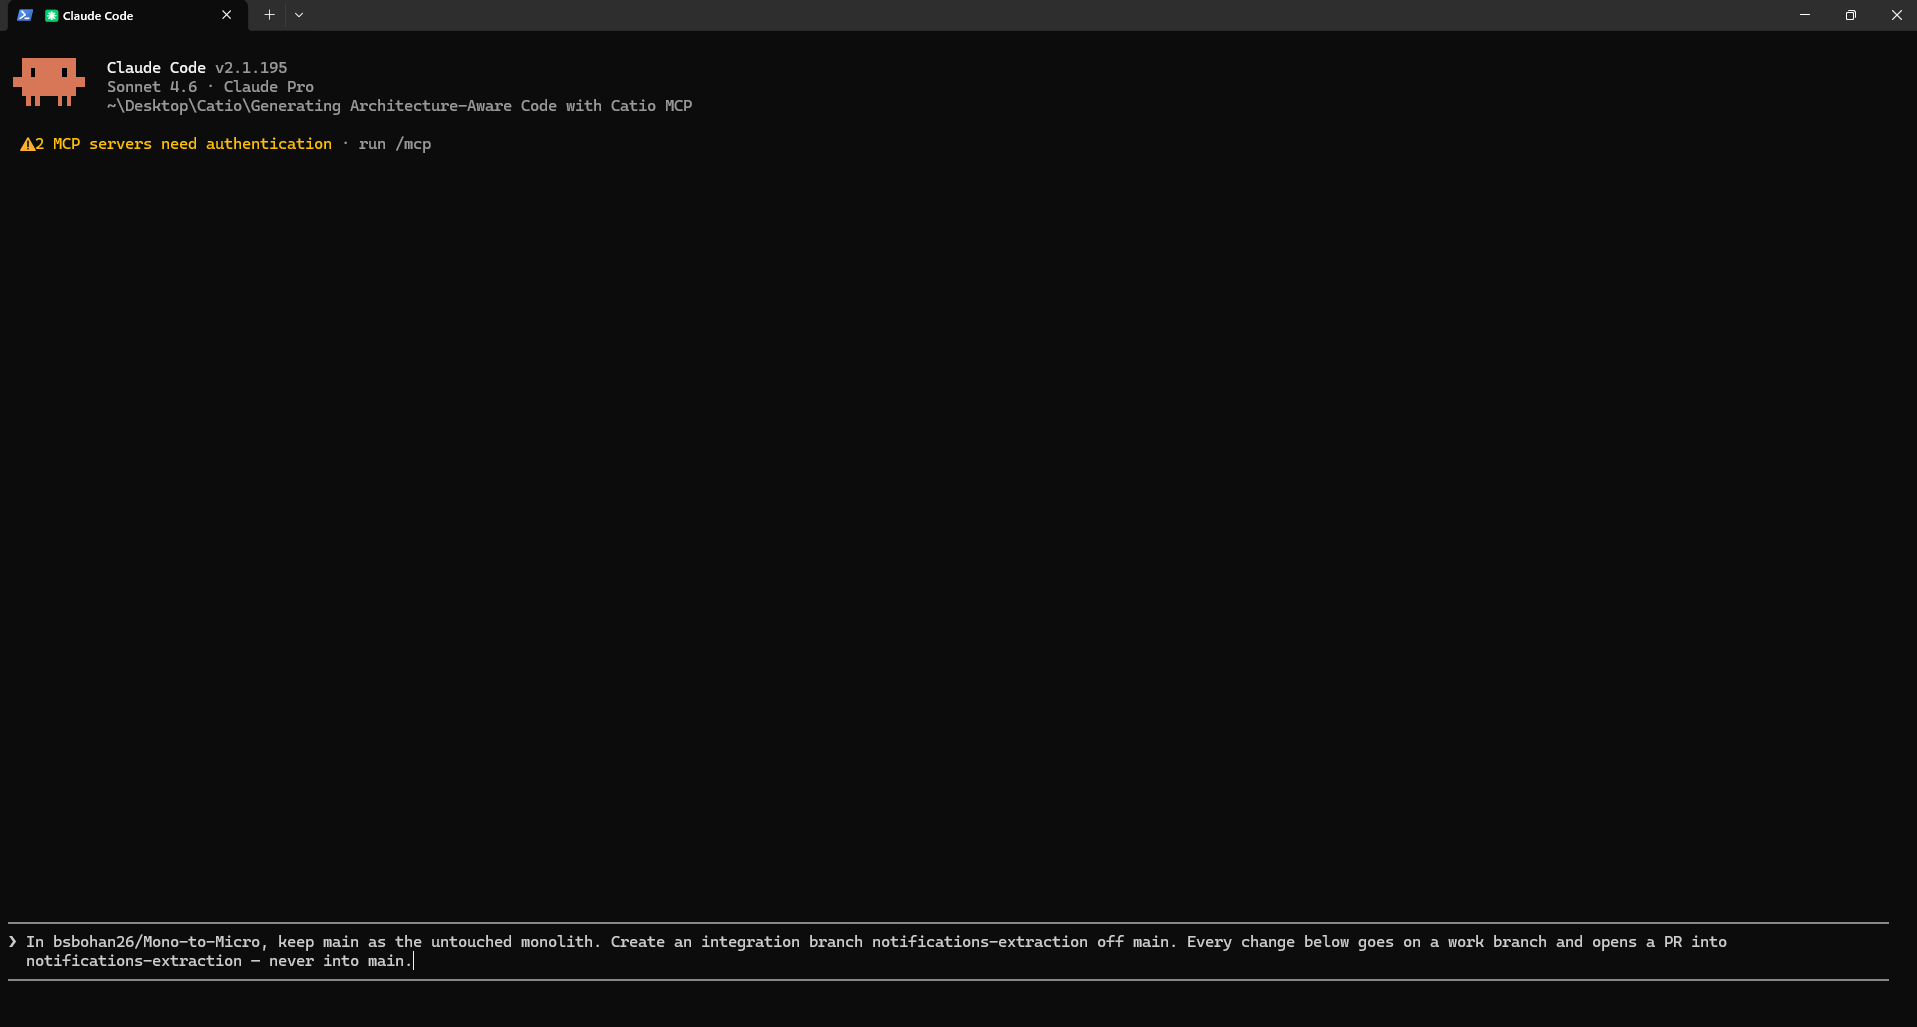
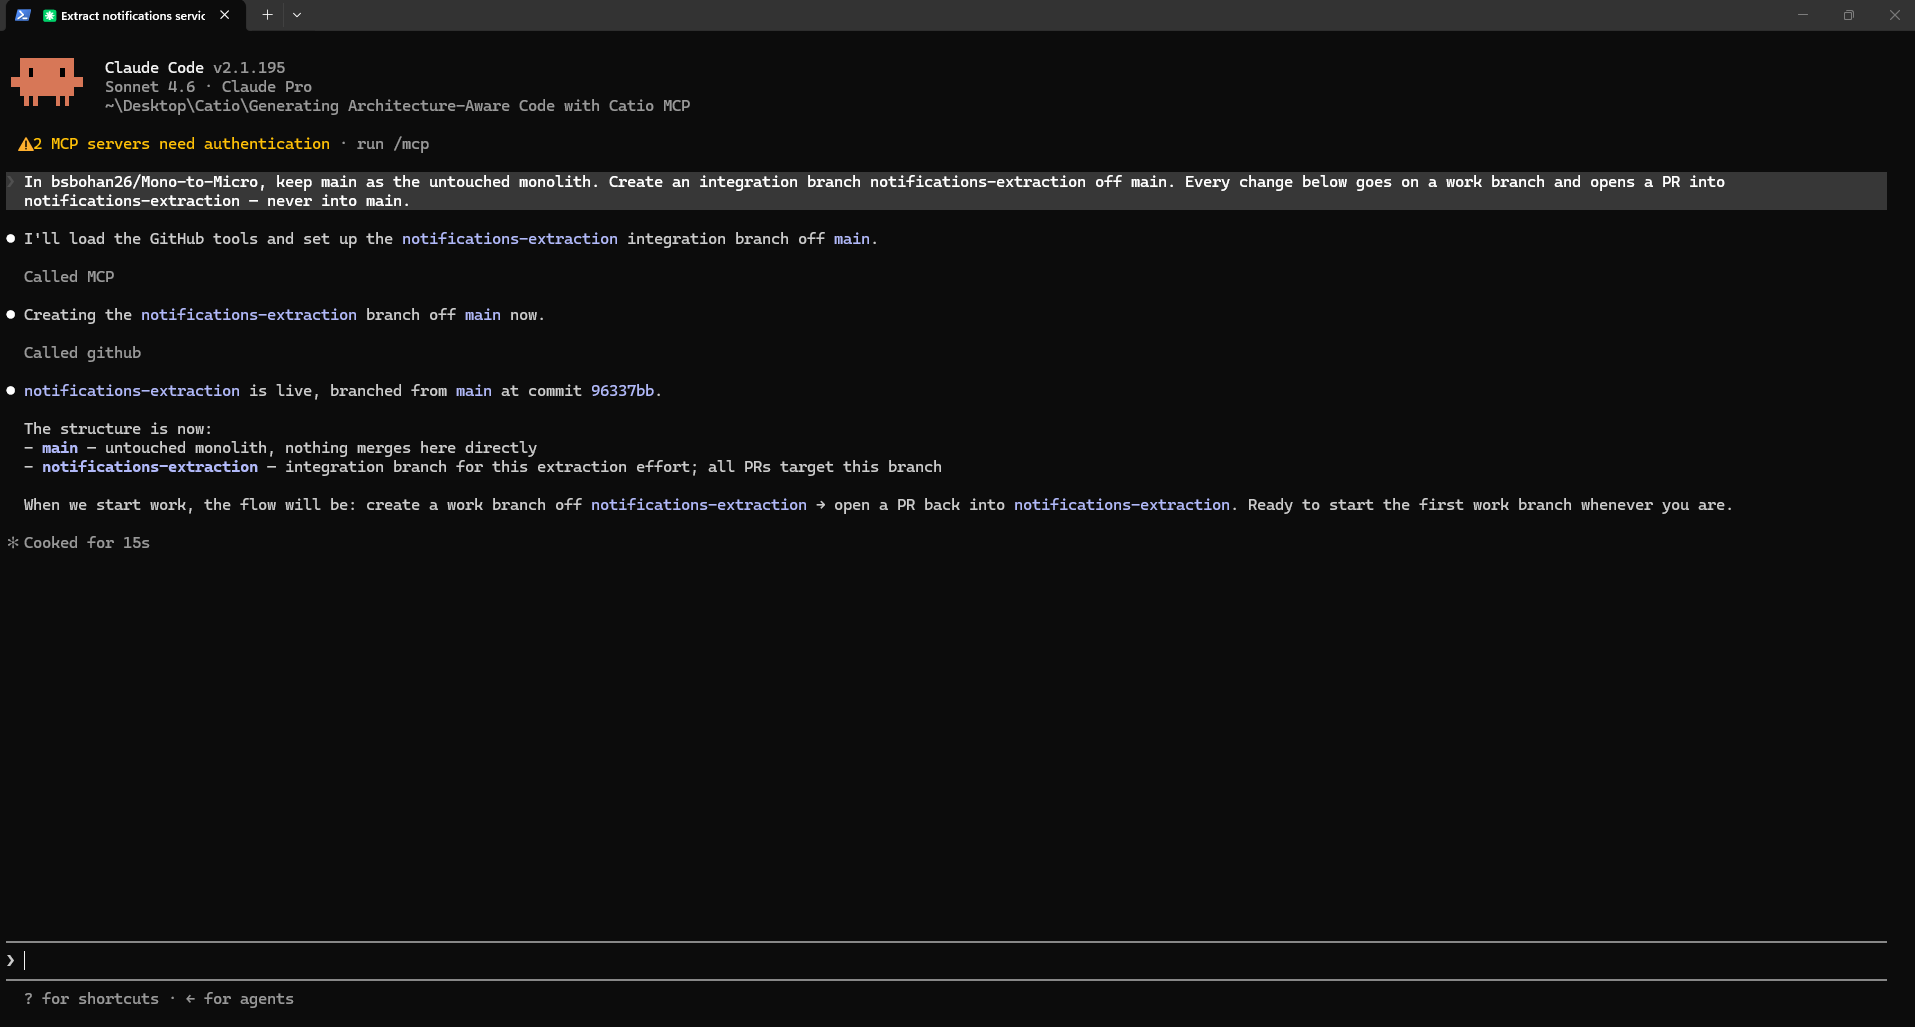
Keep main untouched. Create an integration branch for the extraction effort, and route every change through a work branch that opens a PR into the integration branch, never into main.
In <your-repo>, keep main as the untouched monolith. Create an integration
branch notifications-extraction off main. Every change goes on a work branch
and opens a PR into notifications-extraction, never into main.
This keeps the working monolith safe while the extraction is assembled and reviewed in one place.
Step 2: Find or generate the Blueprint
Ask Catio for the Blueprint by describing what you want, and ask it to summarize the target boundary, the Redis event handoff, and the seams to cut. Catio either returns an existing Blueprint or generates one, then gives you the summary.
Use Catio. Get recommendation <recommendation-id> and summarize the target
boundary, the Redis event handoff, and the seams to cut.
OR
Use Catio. Get the recommendation for extracting the Notifications domain
out of the Orders monolith, and summarize the target boundary, the Redis
event handoff, and the seams to cut.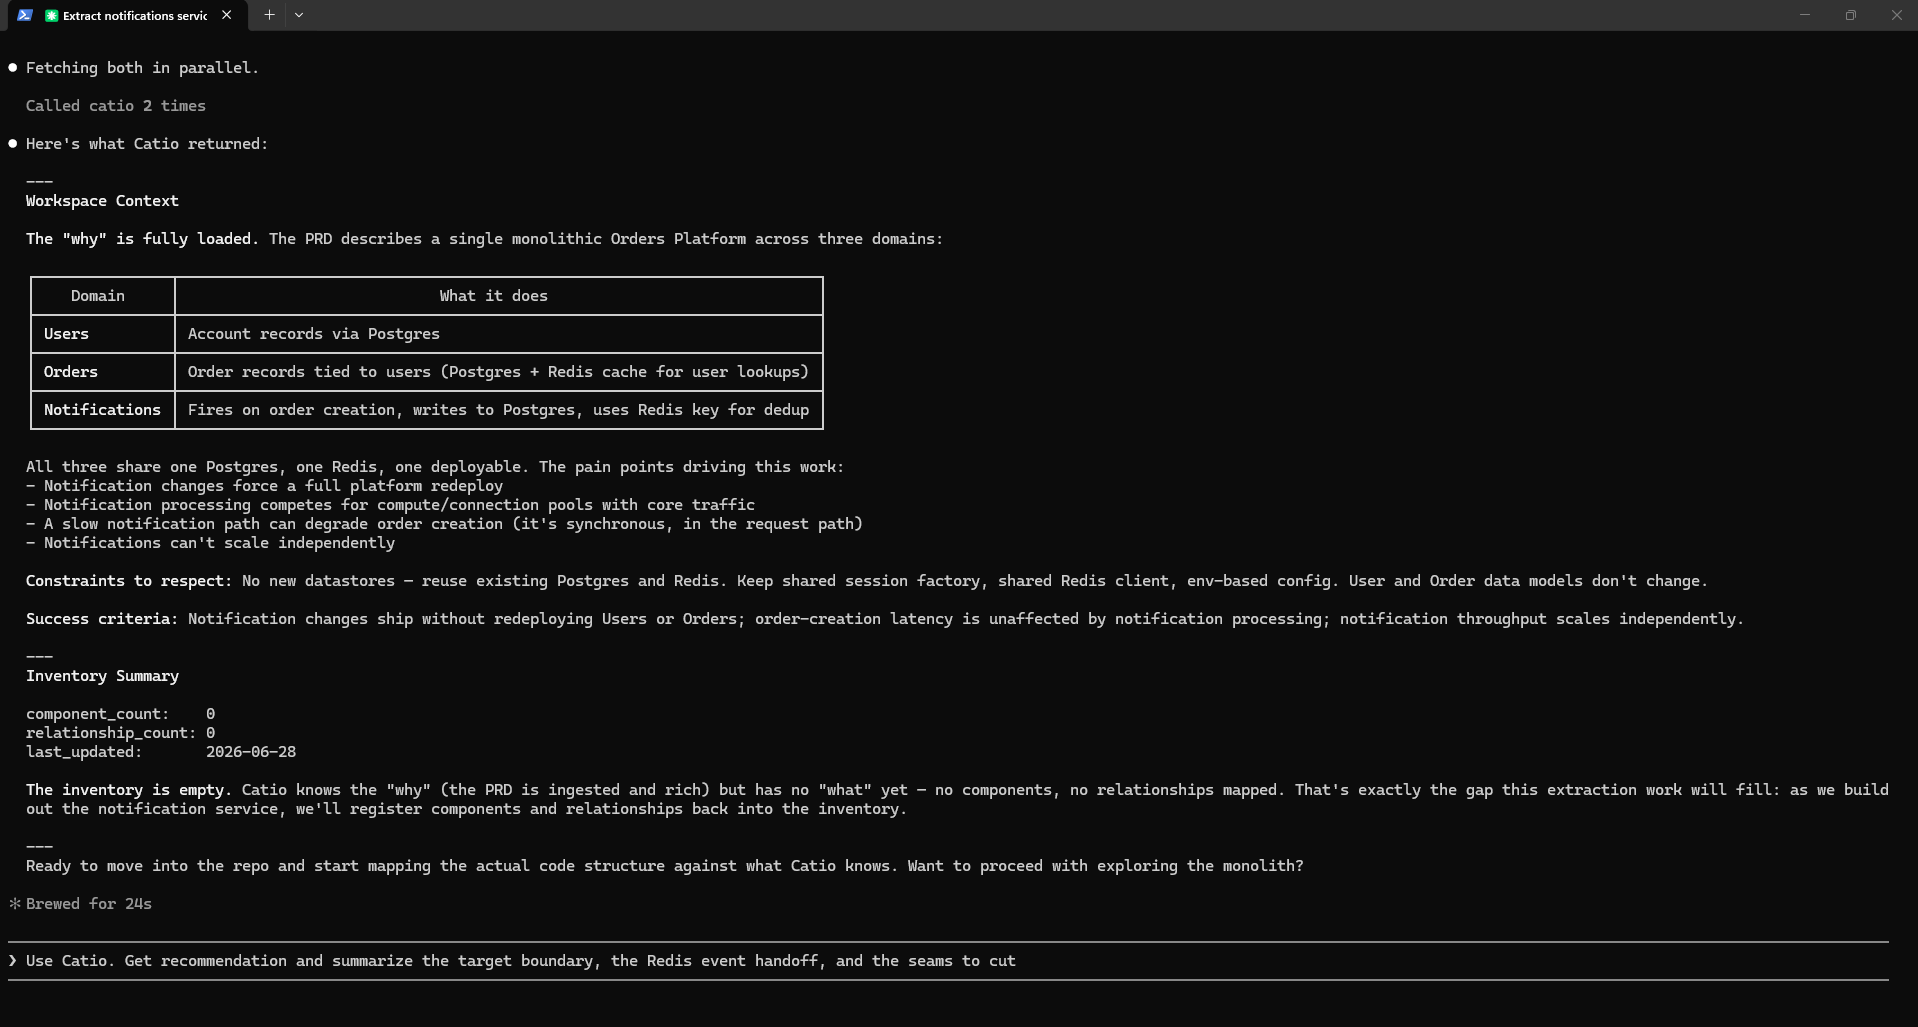
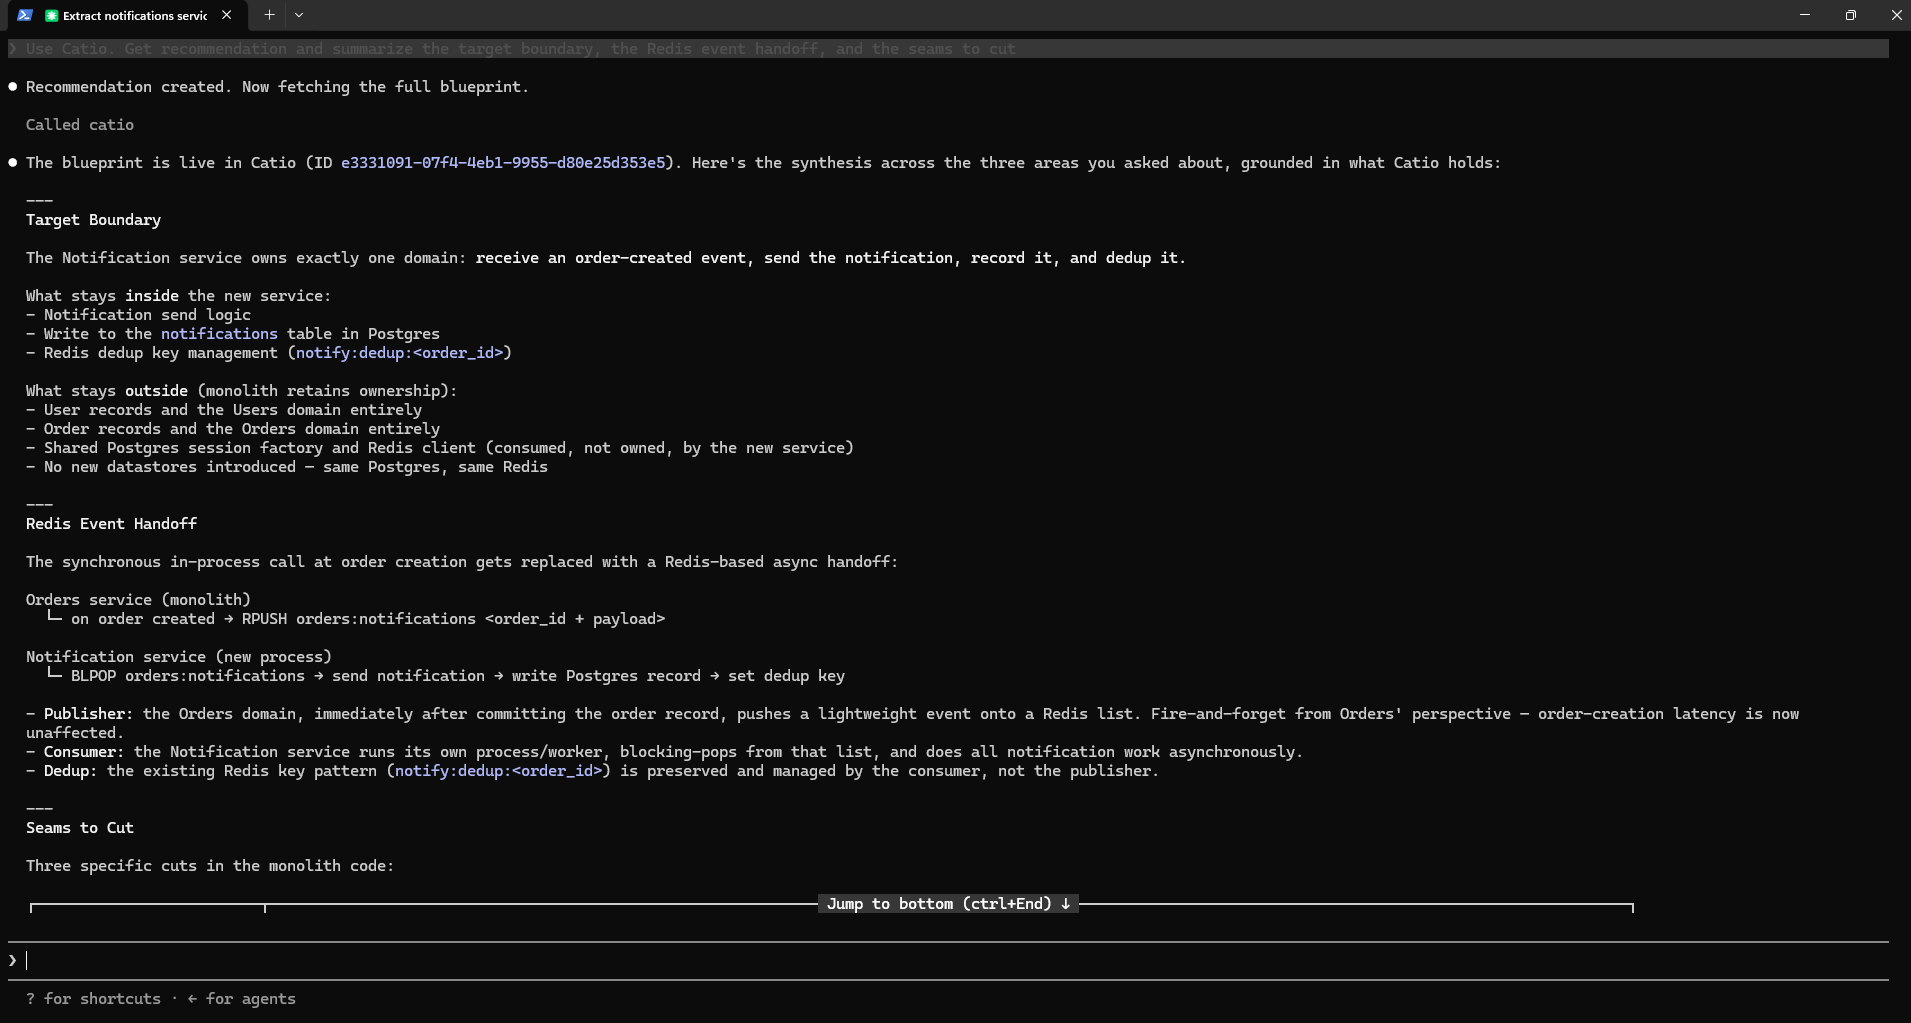
In this walkthrough no matching Blueprint existed, so Catio generated one through Archie: it fetched the PRD from your workspace context, searched the inventory for relevant components, and created and persisted the Blueprint itself. In this flow you generate via Archie rather than calling create_recommendation by hand. The create_recommendation and create_design tools do exist, but they are for manual, hand-authored Blueprints where you supply the content directly. The new Blueprint comes back as a Recommendation with an ID, along with the synthesis you asked for.
Behind the prompt, Catio resolves your request through search_recommendations, which matches on keywords in a Blueprint's title and content, not on a full natural-language description. The assistant reduces your intent to the core domain noun, notification, and searches on that. Multi-word conceptual phrases like migrate monolith to microservices return zero results even when a matching Blueprint exists. The pattern is: reduce the intent to the primary noun, then search.
If a Blueprint already exists, that same search returns its ID and summary, and get_recommendation <id> pulls the full content. You skip generation and move to Step 4.
See below the creation of the new Recommendation:
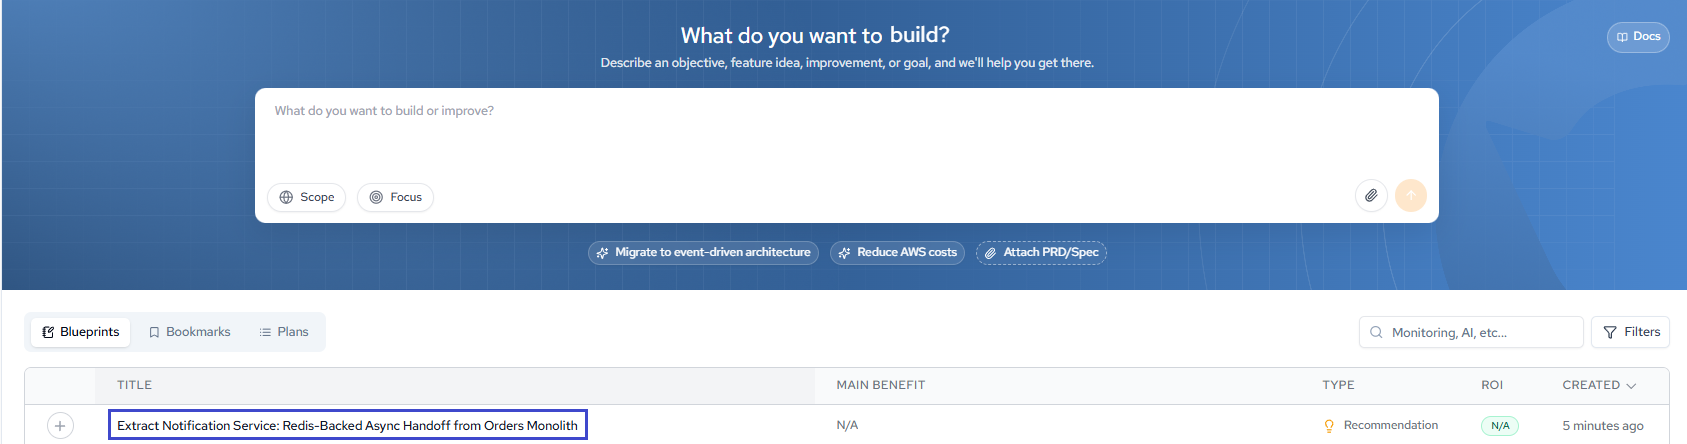
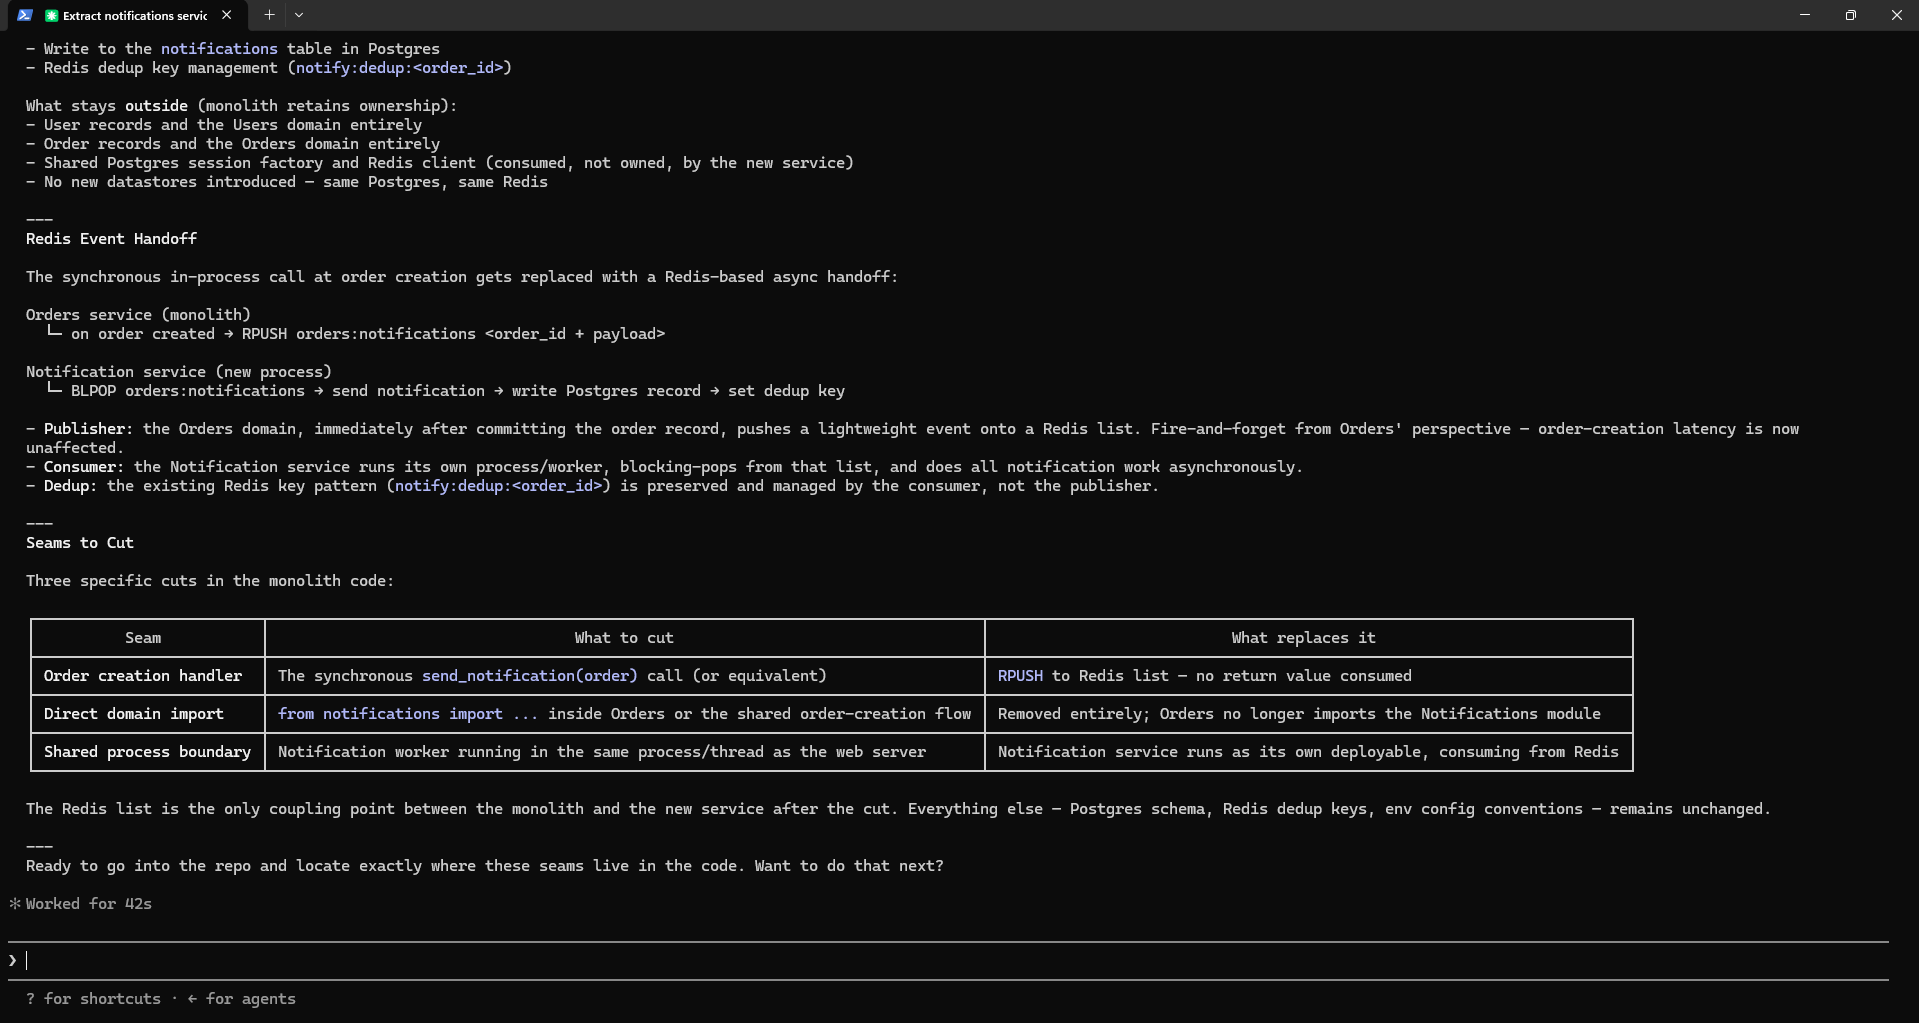
Generation runs through ask_archie and is polled with get_archie_response. It may need repeated polls before the Blueprint lands.
The synthesis Catio returns is generated from your workspace context, not read from your code, so treat its specifics as a draft to verify against the repo. The persisted Blueprint is full-content: pulling it later with get_recommendation returns all sections, including the implementation plan. Step 4 maps it against real code before any of it is trusted.
For handling Blueprints in depth, see Interpreting and Acting on Blueprints.
Step 3: Extract the constraints and target architecture from the Blueprint
With the Blueprint generated, have the assistant read the workspace context and inventory summary through Catio MCP and line them up against it. This is the orientation step: it makes the constraints and target architecture the Blueprint carries explicit before you map them to code. The workspace context carries the why: the domains, the pain points driving the change, and the constraints to respect. The inventory summary carries the what: the components and relationships Catio has mapped.
Use Catio. For the <workspace> workspace, show me the workspace context
and inventory summary.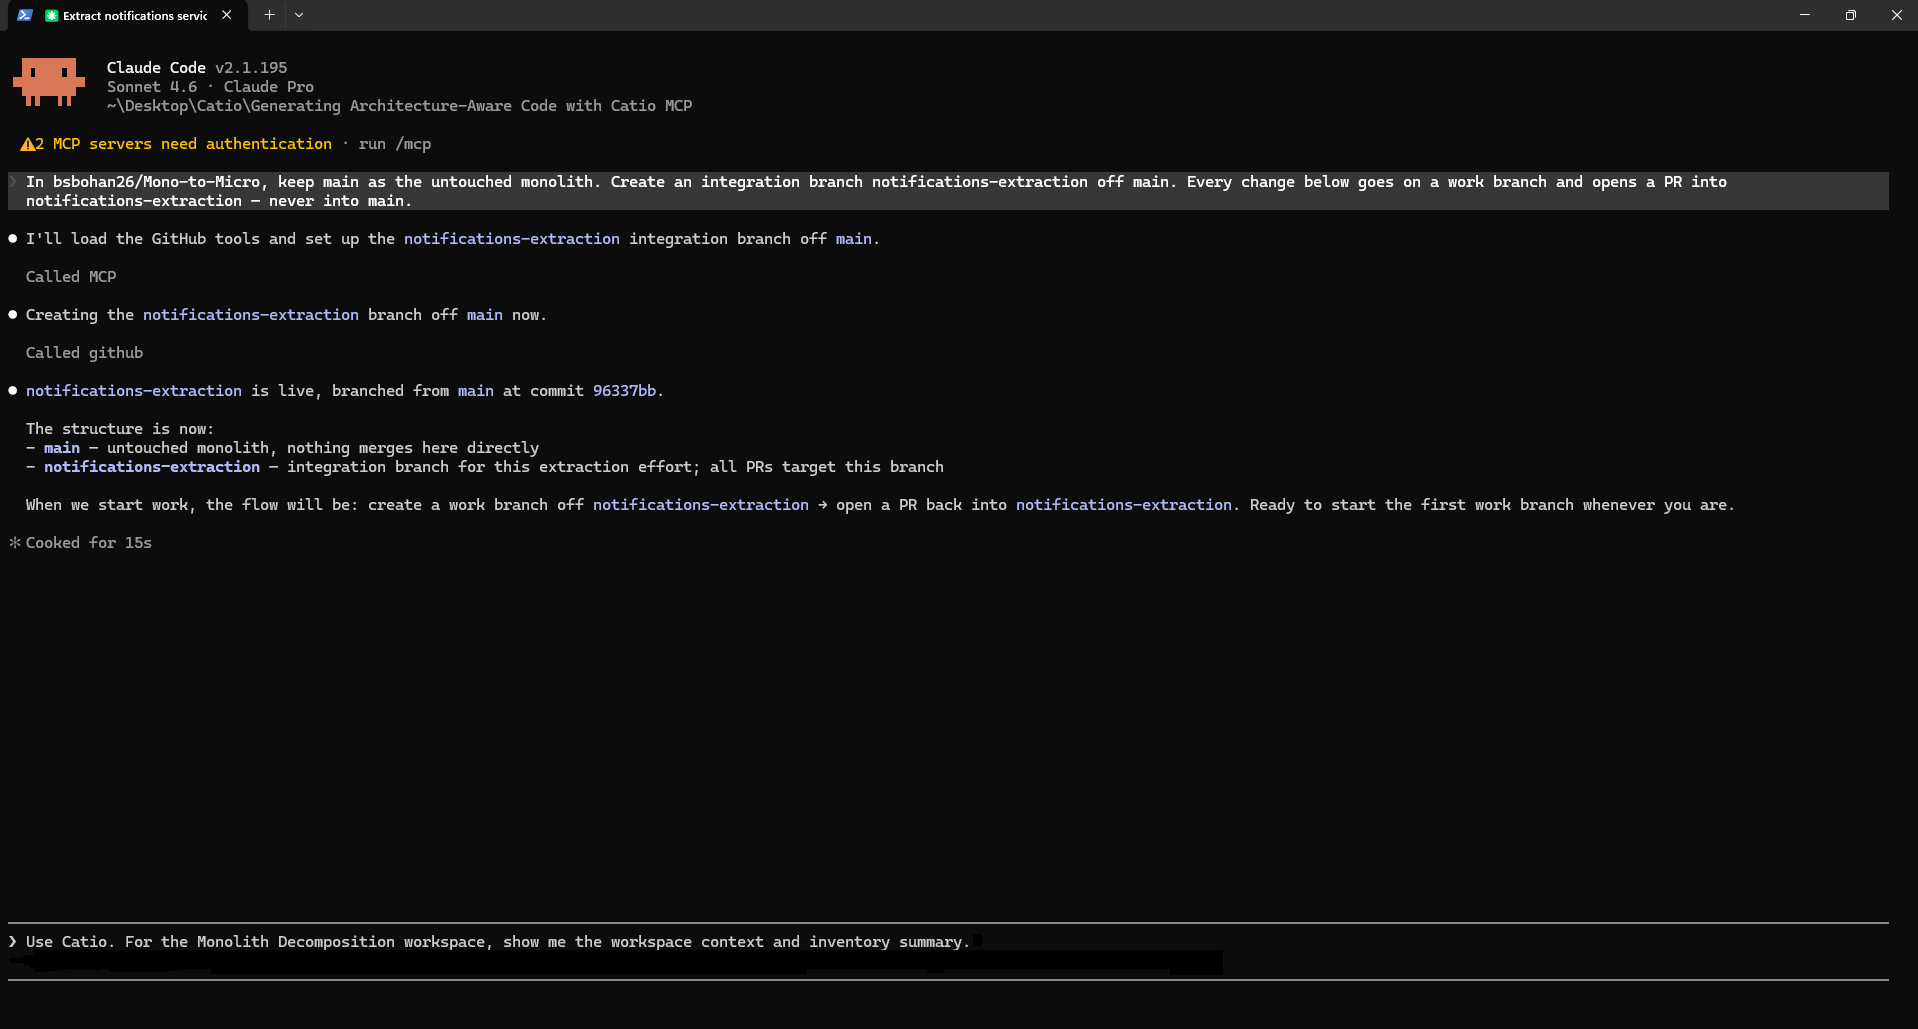
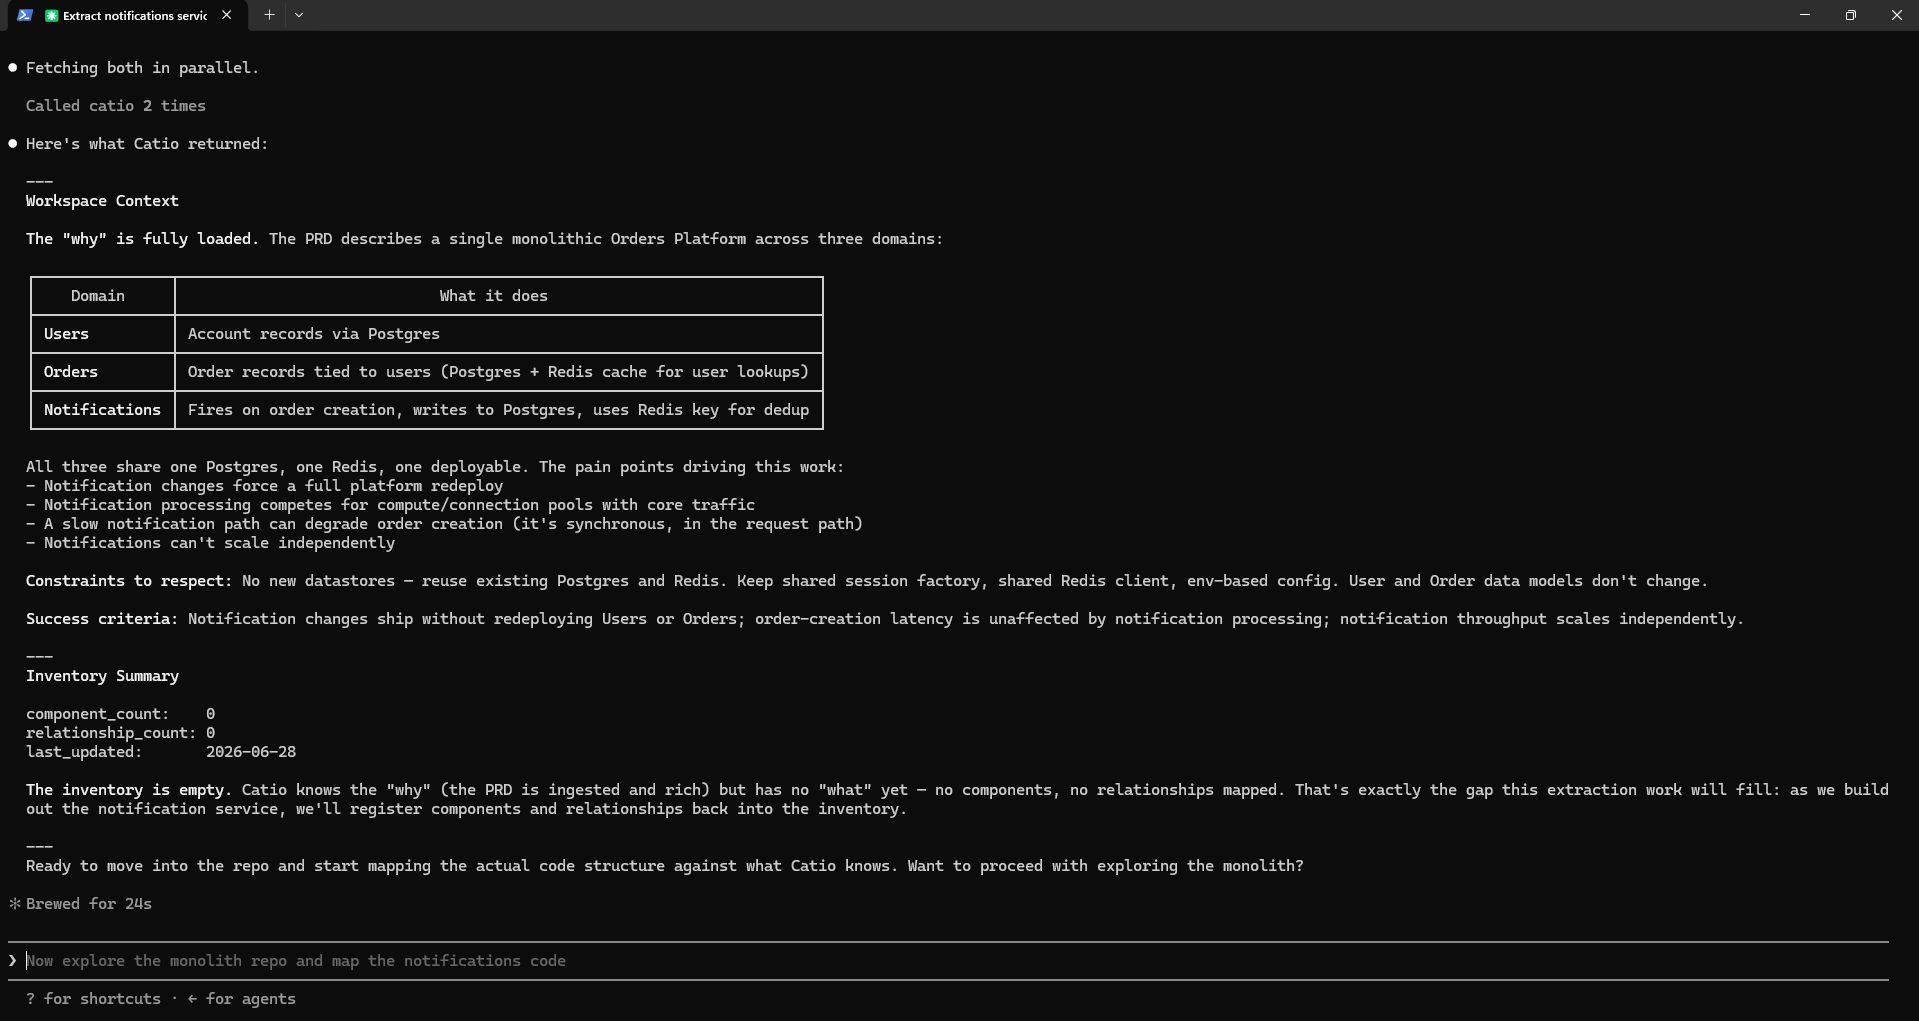
This calls get_workspace_context and get_inventory_summary. The workspace context returns the constraints for this scenario: no new datastores, reuse the existing Postgres and Redis, keep the shared session factory and Redis client, and leave the User and Order data models unchanged. These are the same constraints the Blueprint was generated against.
The inventory comes back empty at this stage: no components, no relationships mapped yet. Catio has the why from the ingested PRD but not the what, because nothing has been registered into the inventory. That gap is expected here. The grounding for the Blueprint came from this workspace context, and the exact code seams get located next by reading the repo directly.
Catio performed this same context retrieval internally when it generated the Blueprint in Step 2, so this readout is for your visibility, not a prerequisite for grounding. The coding assistant does not design the change here: Catio already produced the design in the Blueprint, and this step makes it explicit before you map it to code.
Step 4: Map the Blueprint to the repo
This is the bridge step. The assistant reads the repo files through the GitHub MCP and maps each seam in the Blueprint to its exact location in code. Reading the repo is also how the assistant catches drift between the Blueprint and reality.
Read the relevant files via GitHub and map each seam in recommendation
<recommendation-id> to its exact location in code. Confirm the real Redis
dedup key the code uses.
OR
Read the relevant files via GitHub and map each seam in the Blueprint for
the Notifications extraction to its exact location in code. Confirm the real
Redis dedup key the code uses.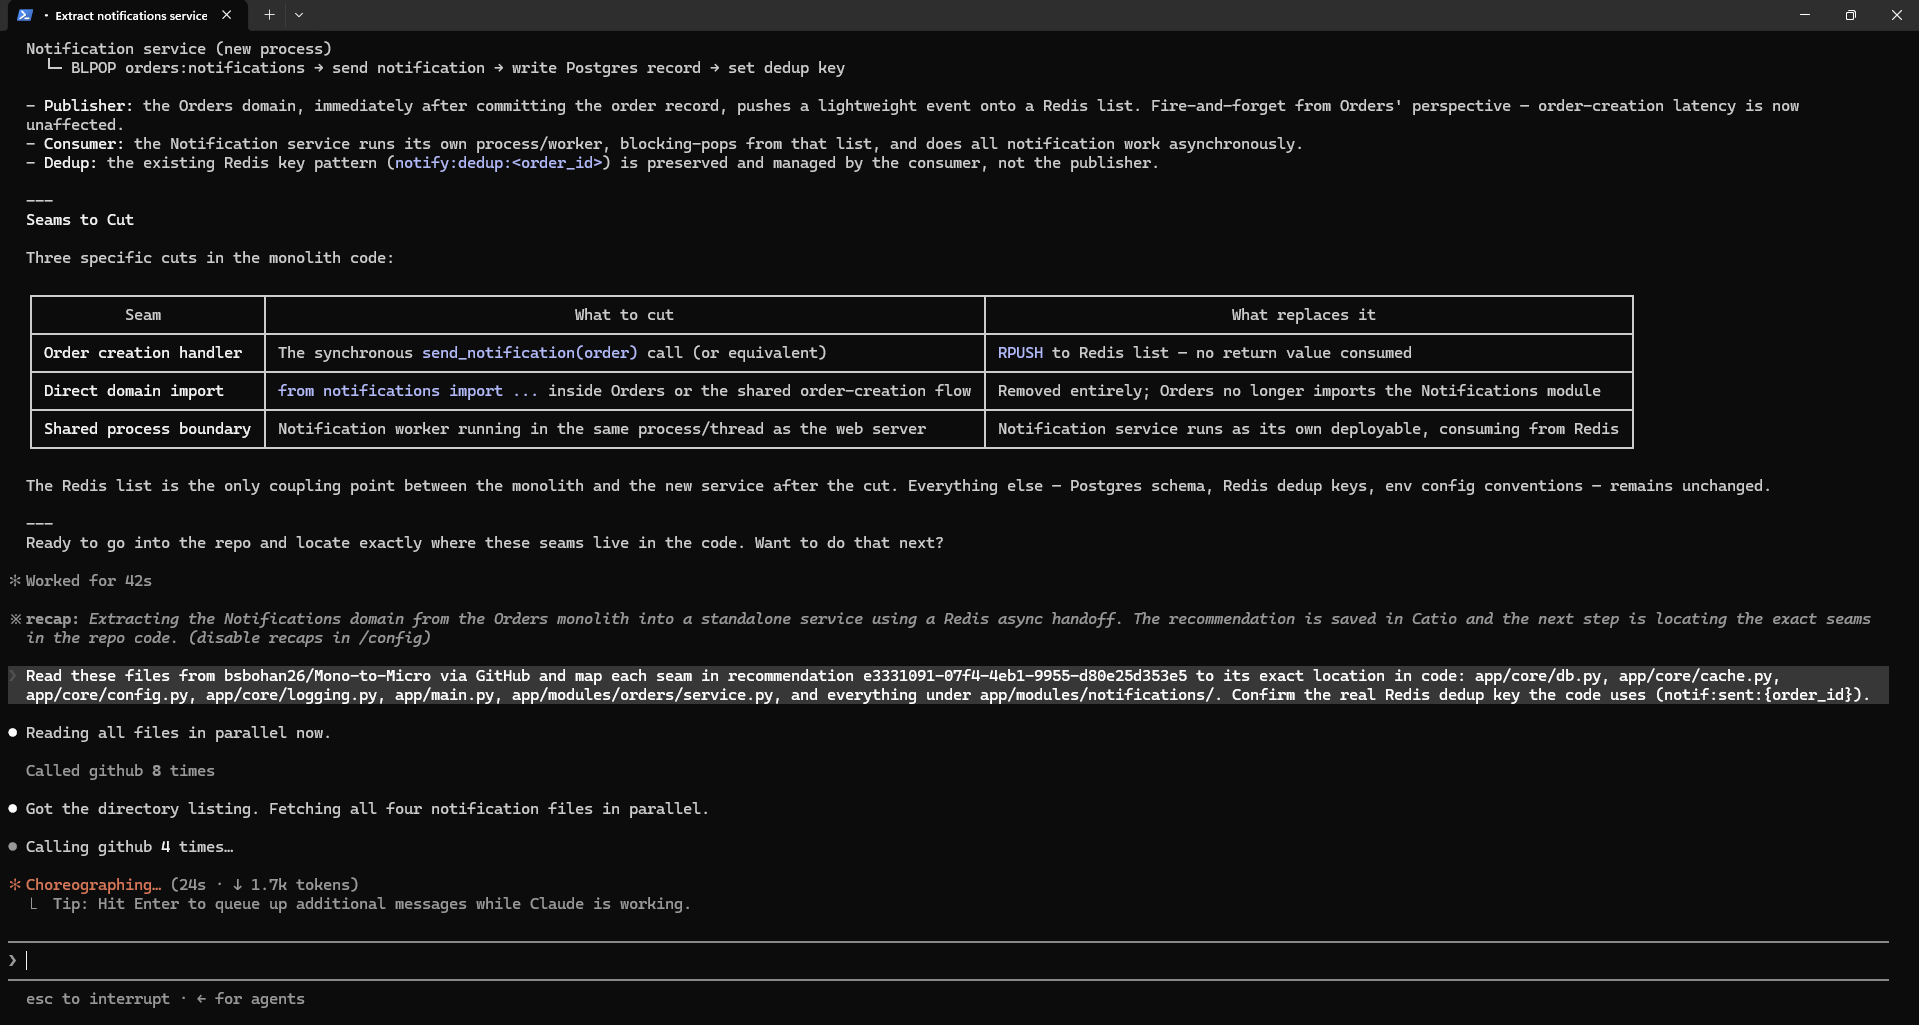
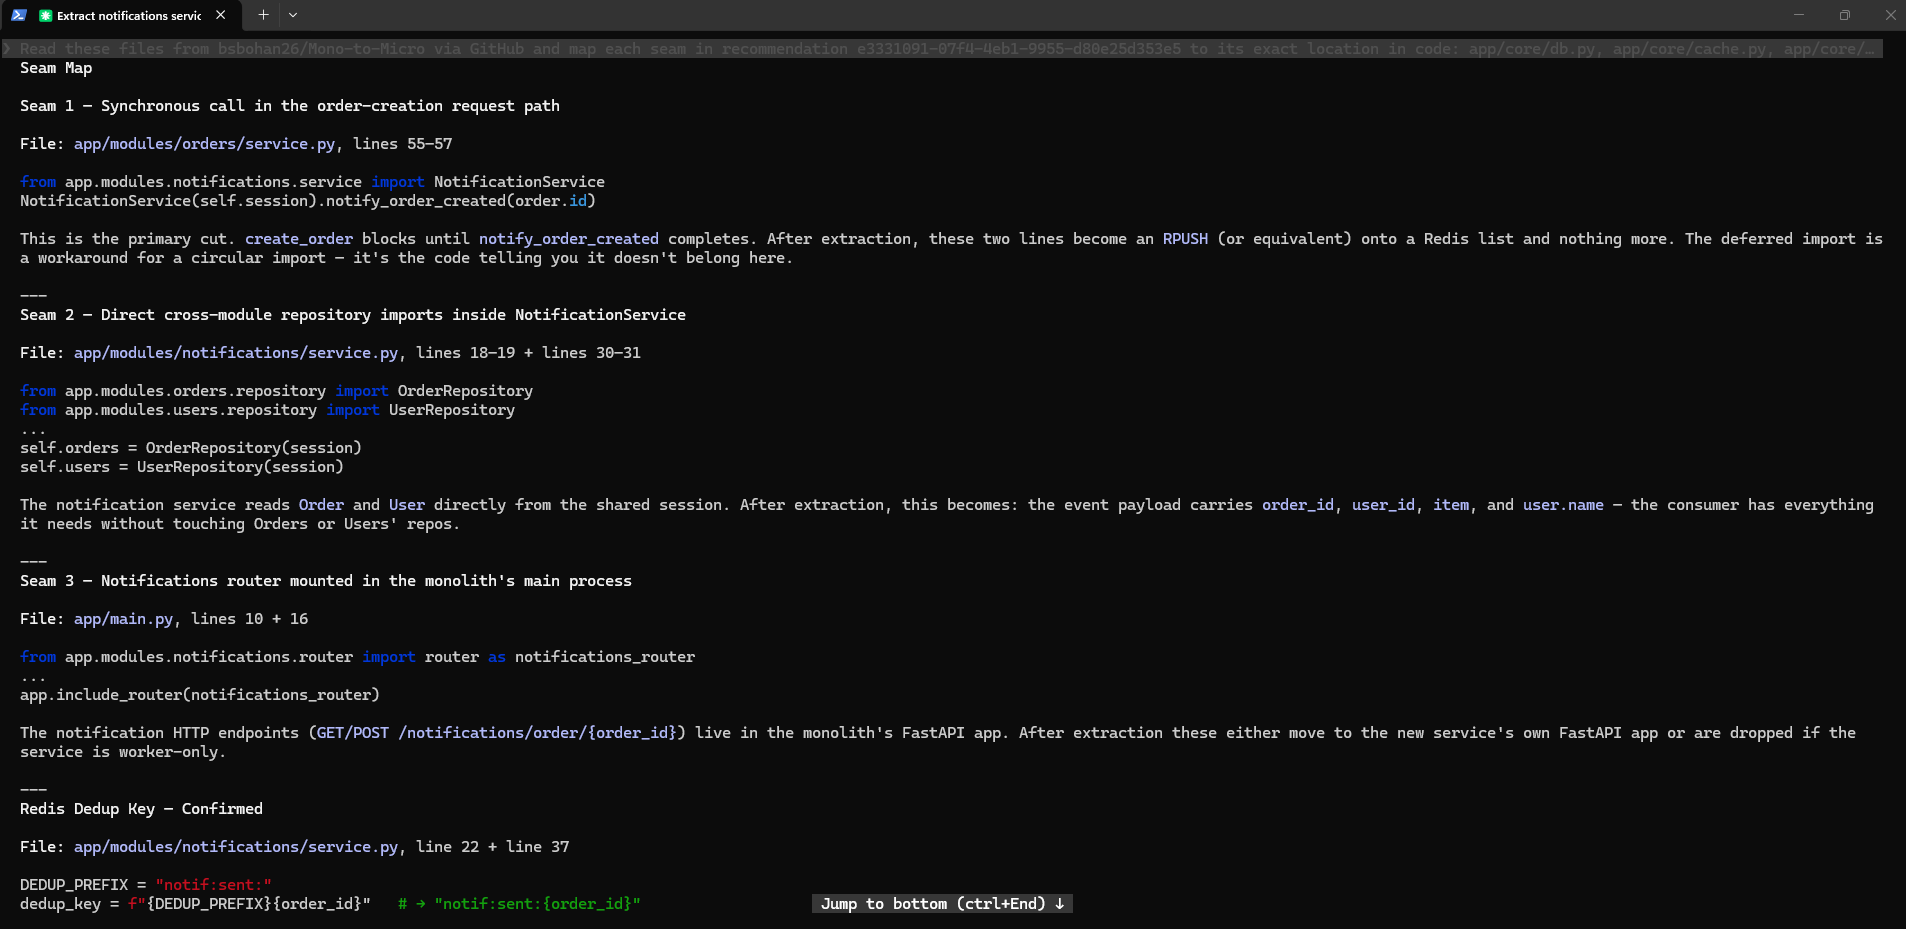
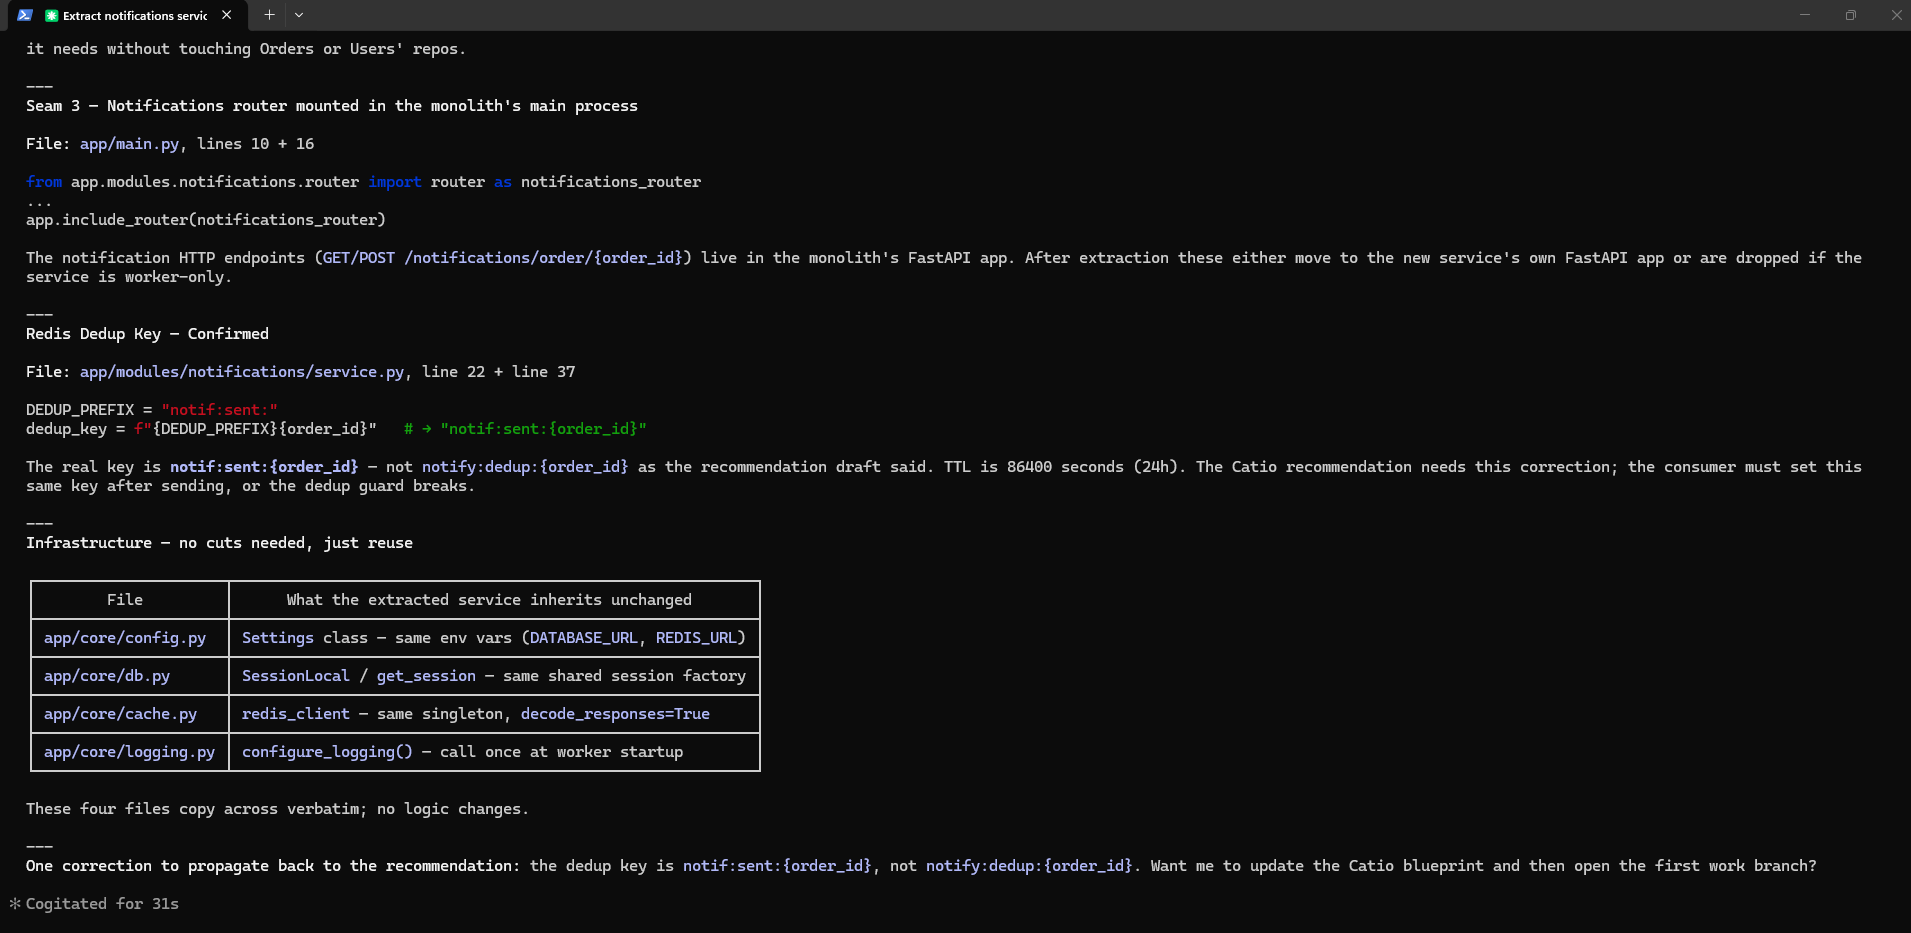
In this scenario the Blueprint draft referenced a dedup key of notify:dedup:{order_id}, but the repo actually uses notif:sent:{order_id}. Because the assistant read the code rather than trusting the description, it used the real key. A boilerplate pass would have shipped the wrong one.
Step 5: Generate the code and open the PR
Now the assistant writes the change on a work branch and opens the PR into the integration branch. The instruction carries the constraints from Catio and the conventions from the repo, so the generated code reuses what already exists.
Create a work branch off notifications-extraction. Based on recommendation
<recommendation-id> and the repo conventions, implement the extraction and
open a PR into notifications-extraction, not main. Preserve the shared session
factory, the shared Redis client, and the env-based config. Use the repo's
actual dedup key. Do not rename it.
OR
Create a work branch off notifications-extraction. Based on the Blueprint
from Step 2 and the repo conventions, implement the extraction and open a
PR into notifications-extraction, not main. Preserve the shared session
factory, the shared Redis client, and the env-based config. Use the repo's
actual dedup key. Do not rename it.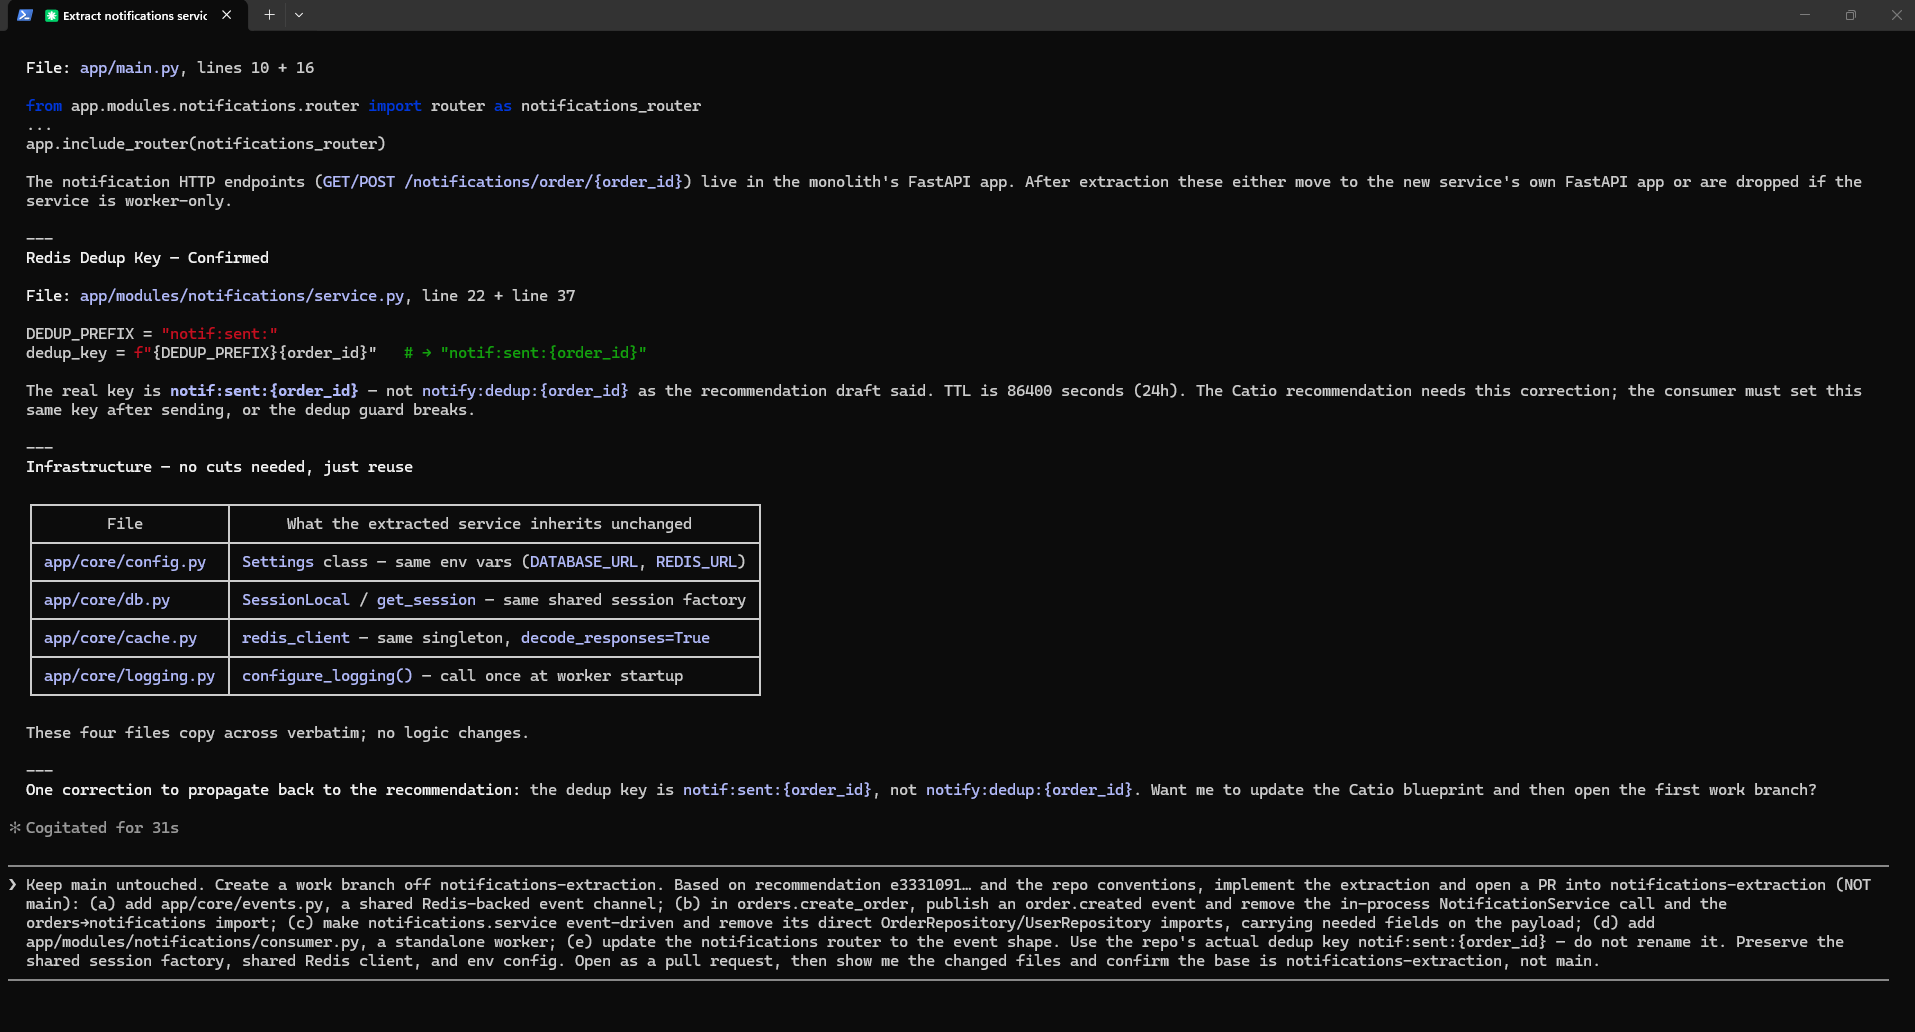
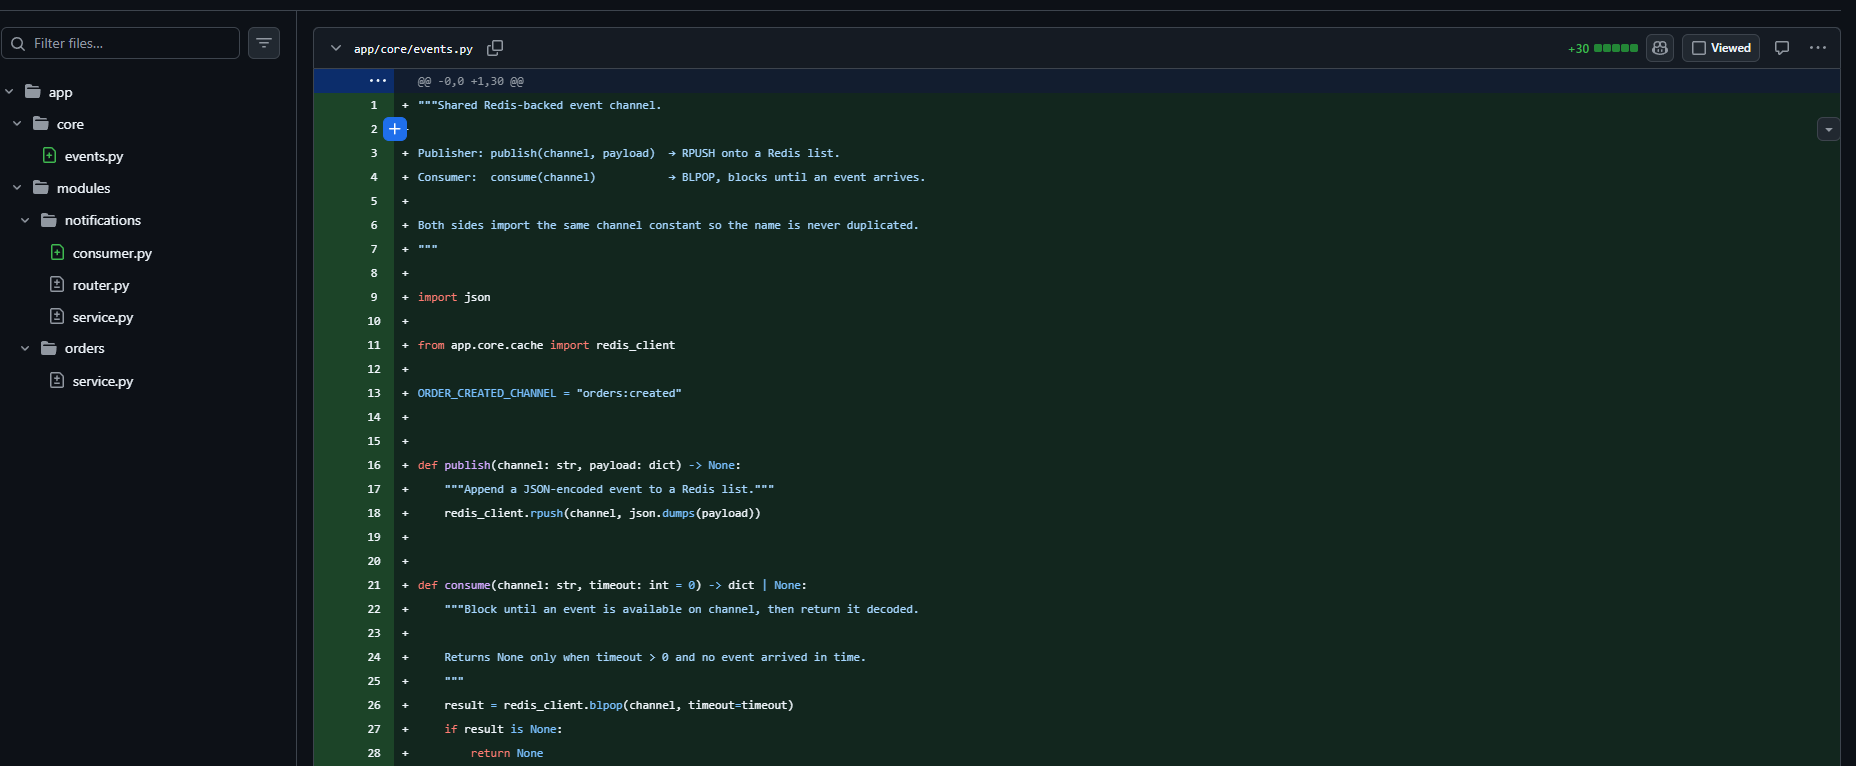
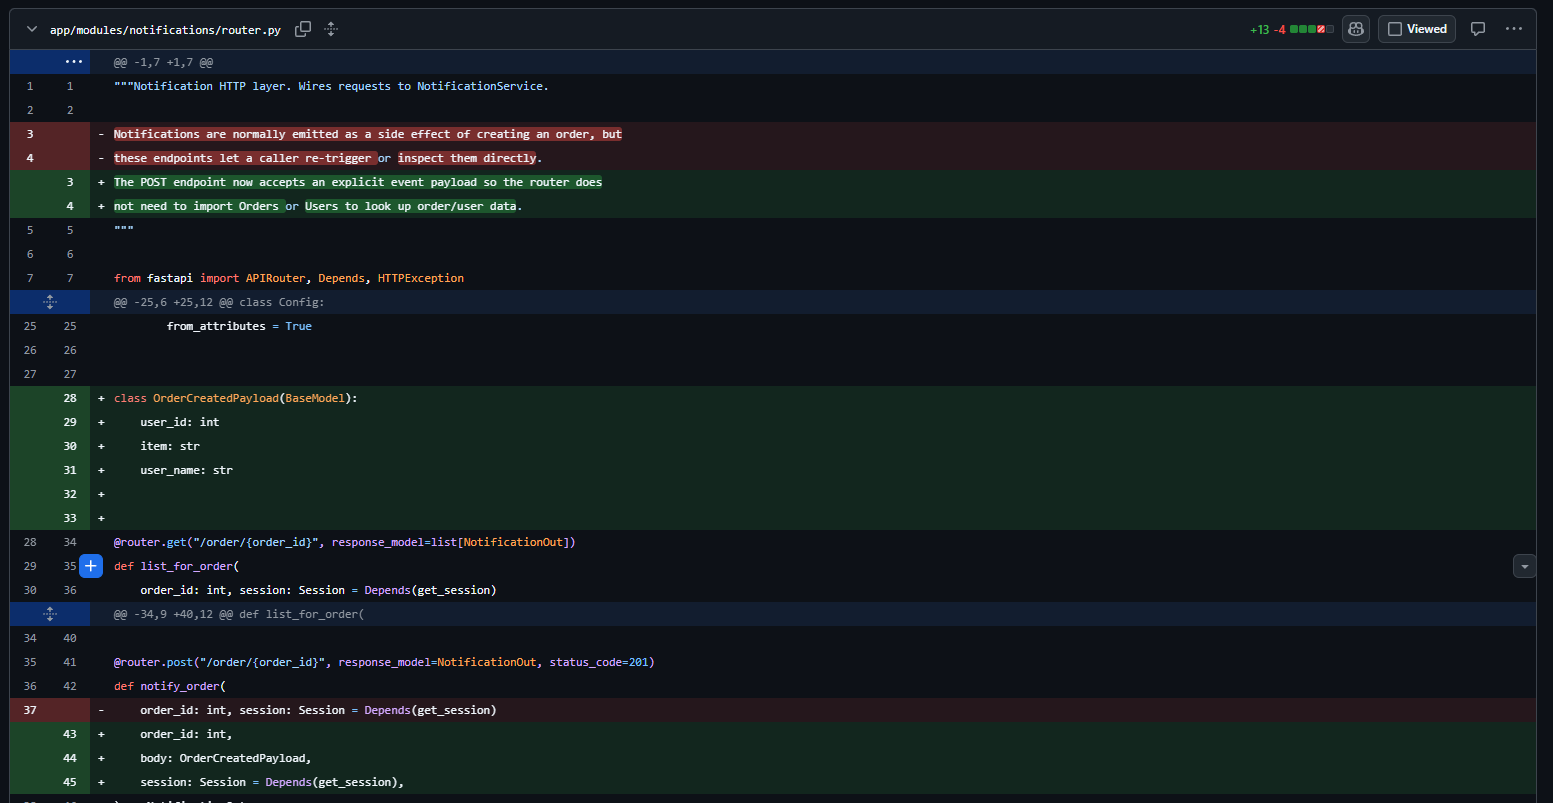
The assistant creates the branch, pushes the changed files in a single commit, and opens the PR through the GitHub MCP. The generated code reuses the existing Redis for the async handoff, writes to the existing Postgres, preserves the real dedup key, and consumes the shared session factory and Redis client rather than re-implementing them.
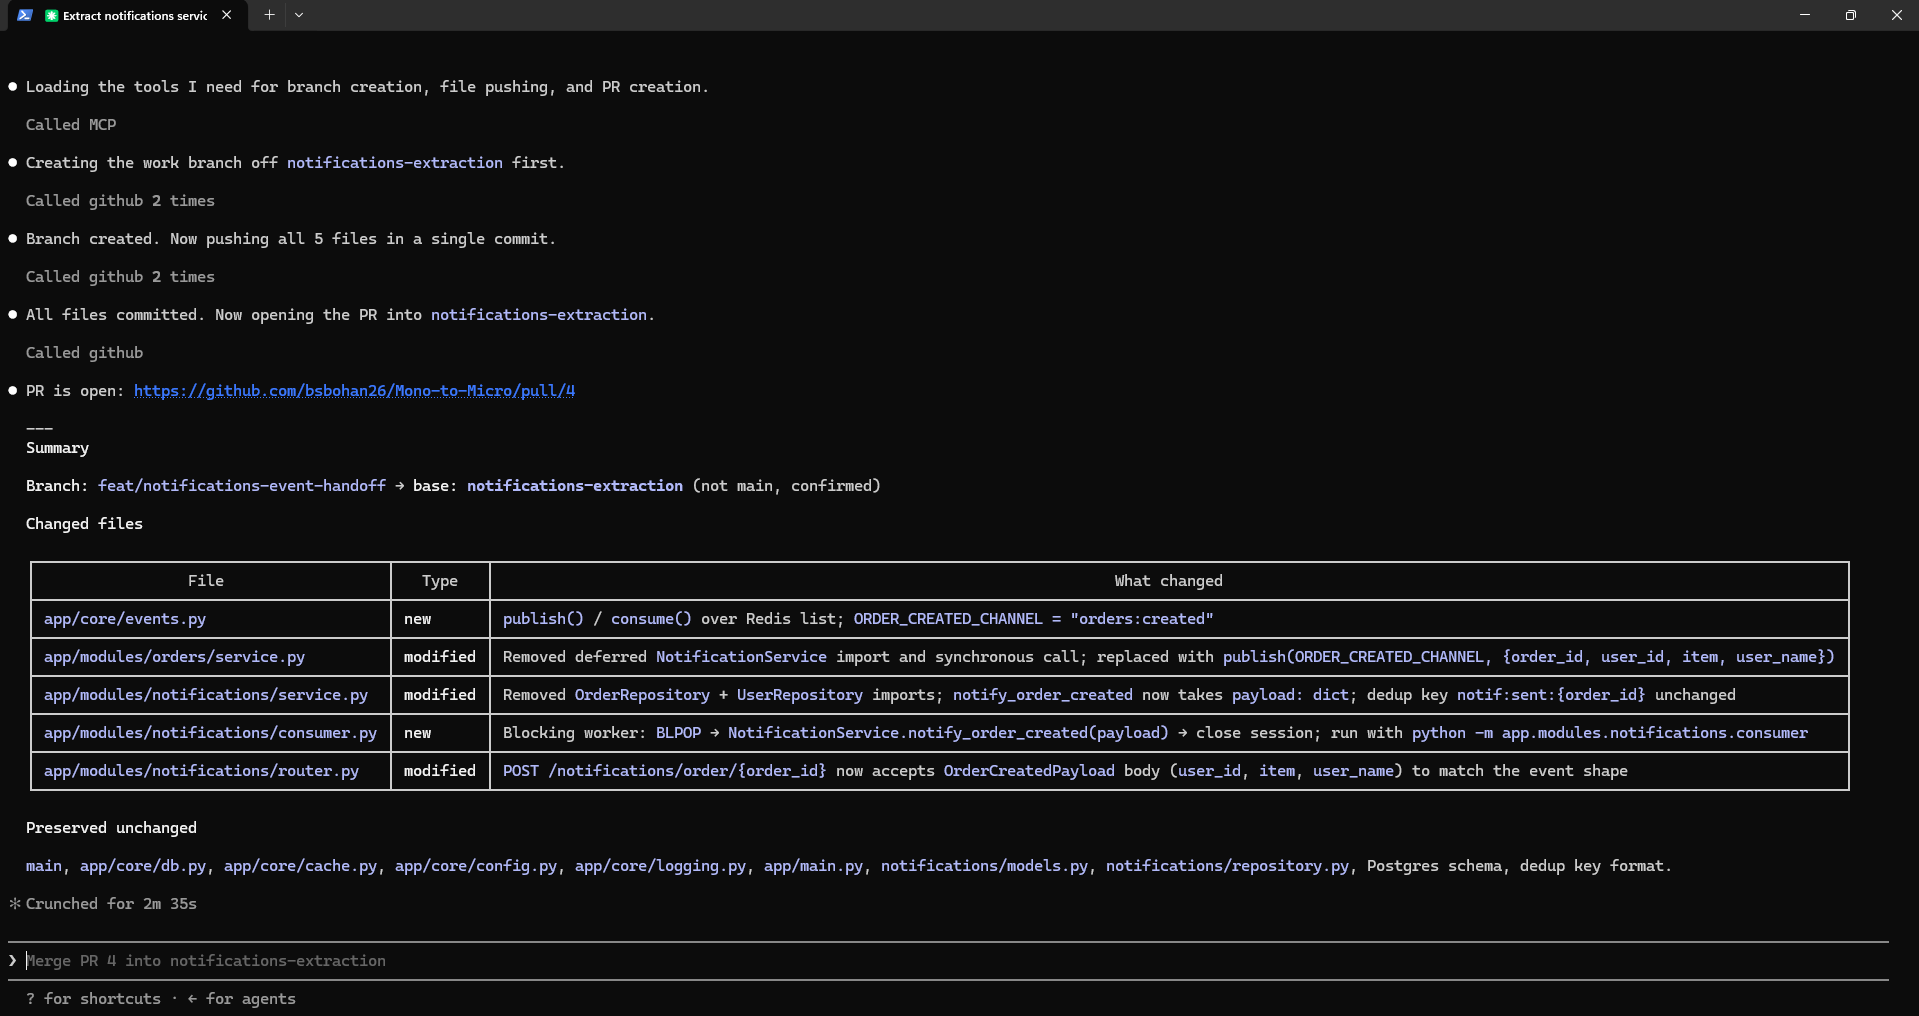
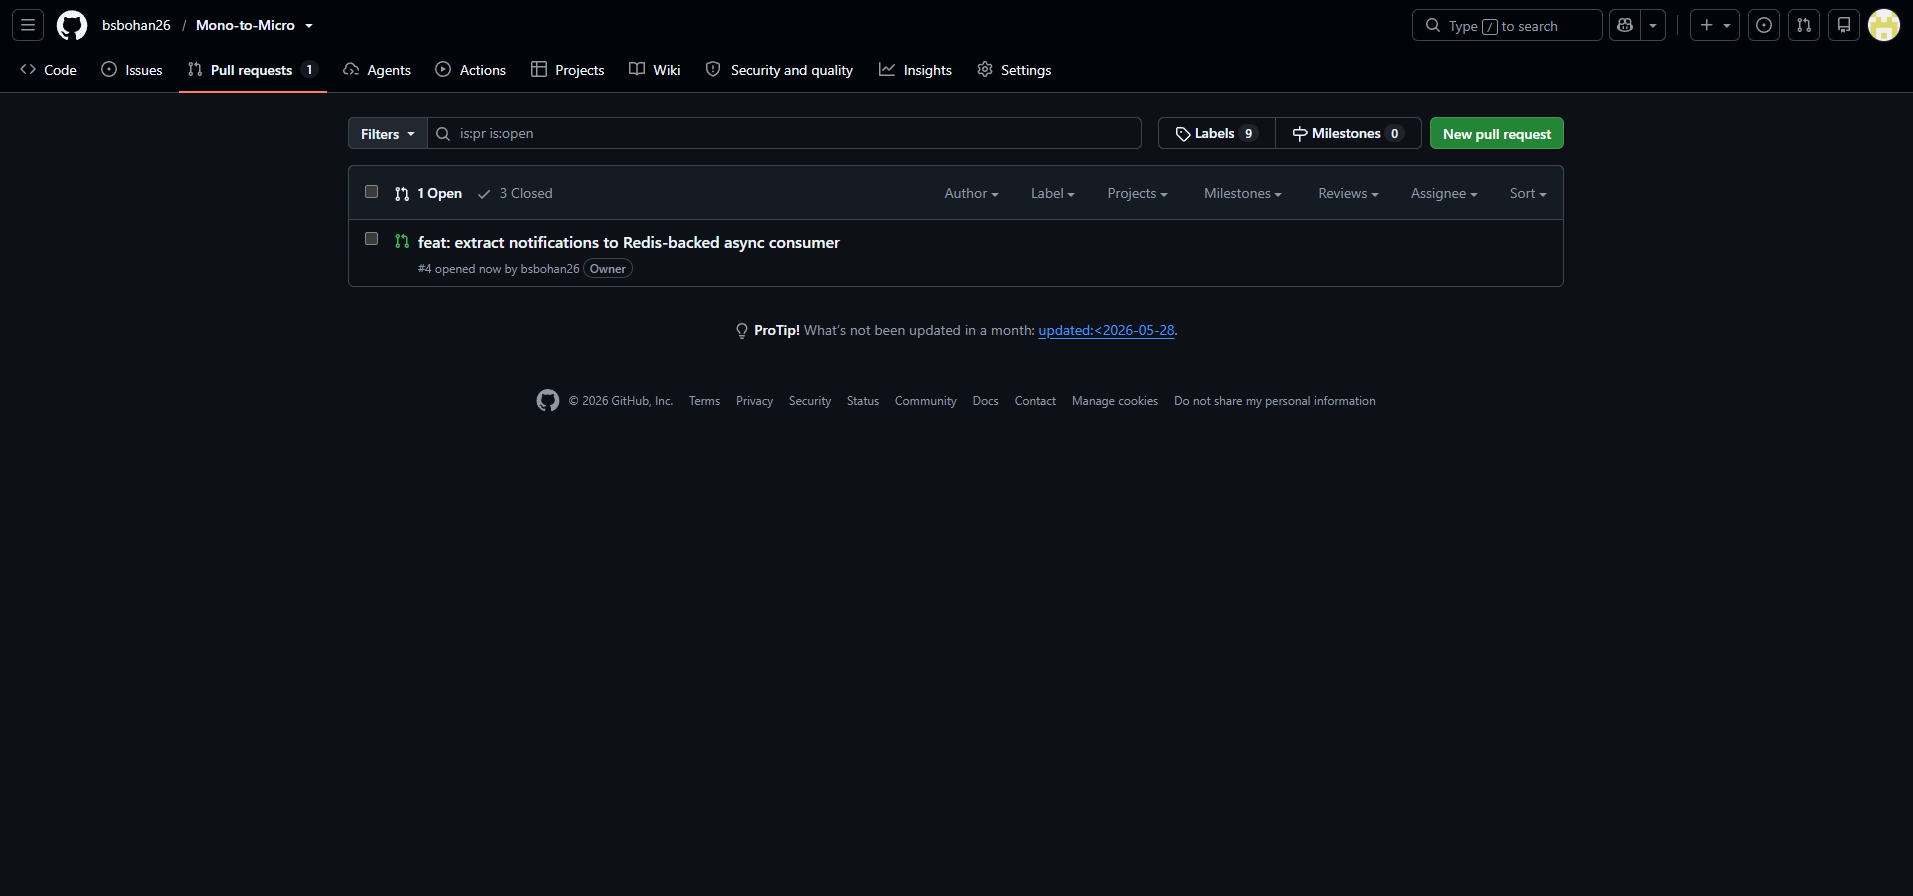
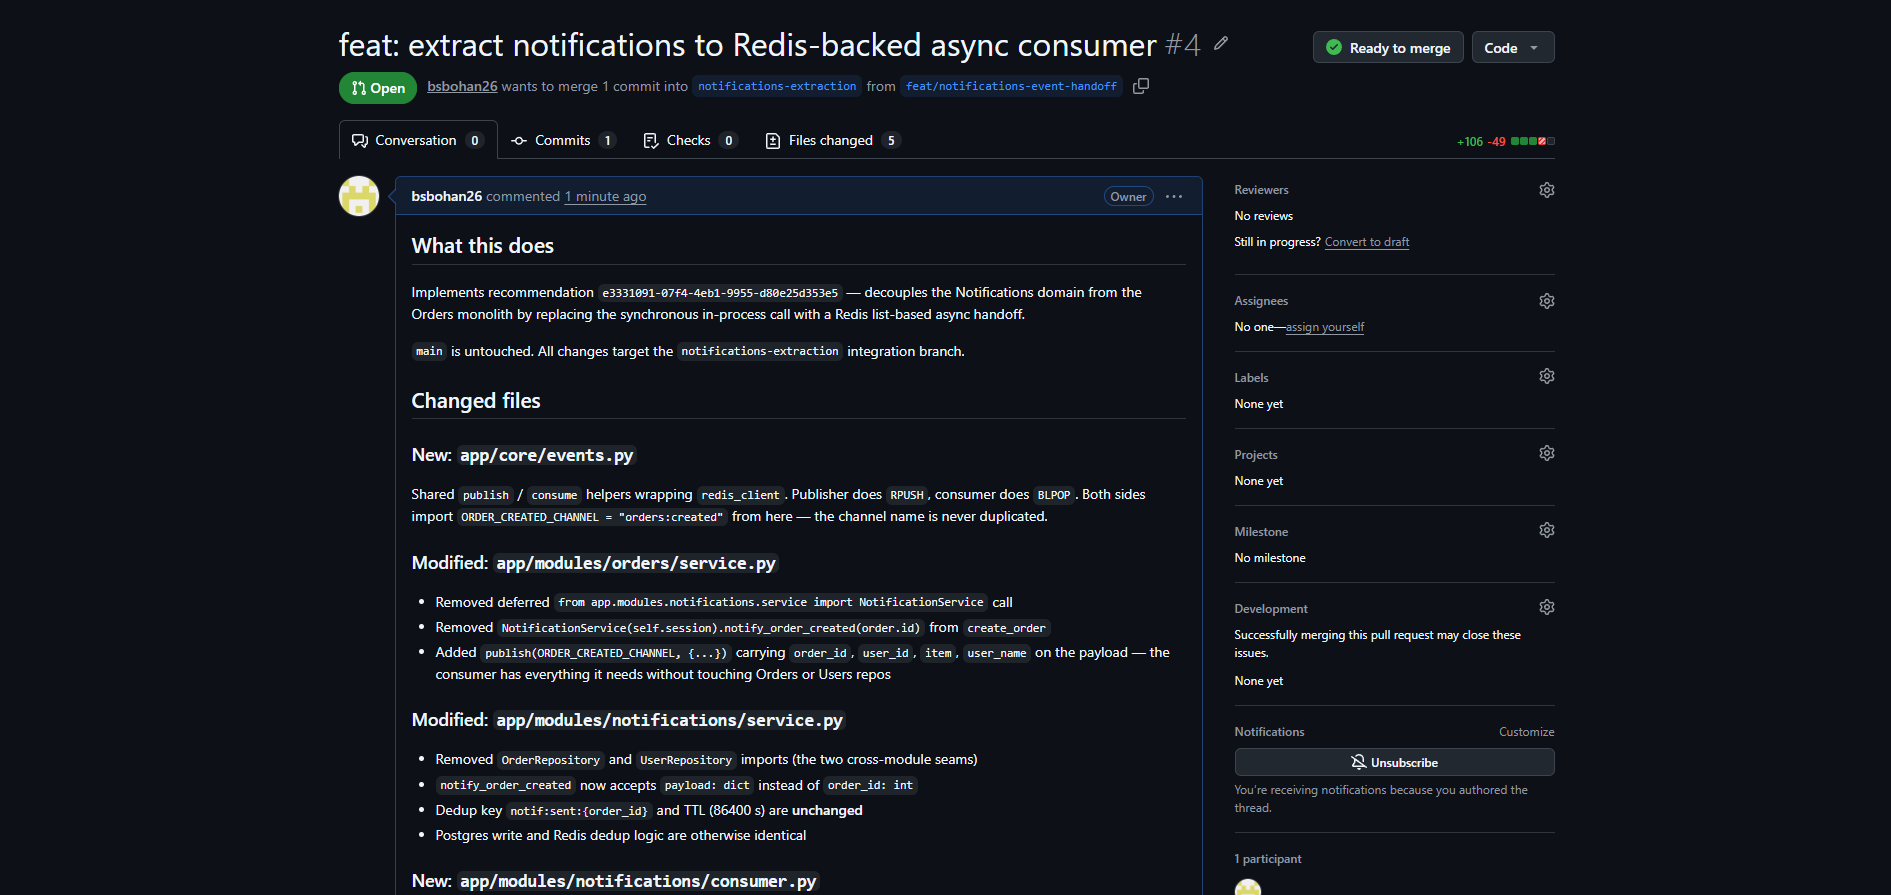
The opened PR targets the integration branch, not main, and shows the changed files ready for review.
Done when
A reviewable pull request that implements the extraction, targets the integration branch, and stays consistent with the patterns already in your codebase. Catio supplied the architecture and constraints, the assistant wrote the code, and the GitHub MCP opened the PR: three roles, one grounded change.
Use the following Repository for reference
Updated 4 days ago